Understanding the Data Transfer Process
Migrating your data from an aging hard disk drive (HDD) to a newer, faster solid-state drive (SSD) is a straightforward process, but understanding the steps involved and potential pitfalls is crucial for a successful and data-loss-free transfer. This section details the fundamental steps, potential risks, and various transfer methods available.
The fundamental process involves several key steps: preparing the destination SSD, choosing a transfer method, initiating the transfer, and verifying the data integrity. Preparation includes ensuring the SSD is properly formatted and has sufficient capacity for your data. The choice of transfer method significantly impacts the speed and complexity of the process. Finally, thorough verification after the transfer is paramount to guarantee data integrity.
Data Transfer Methods
Different methods exist for transferring data, each with its own advantages and disadvantages. Direct cloning creates an exact bit-by-bit copy of your HDD onto the SSD, replicating the entire disk structure including the operating system and applications. This is generally the fastest method but requires specific cloning software. In contrast, a file-by-file copy involves selectively transferring individual files and folders from the HDD to the SSD. This method offers more control and allows for cleaning up unnecessary files during the transfer, but it takes considerably longer.
Potential Risks of Data Loss
Data loss during the transfer process can stem from several sources. Hardware failures, such as a failing HDD or a faulty SSD, can interrupt the transfer and lead to data corruption or loss. Software errors within the cloning or file copying software can also cause problems. Interruptions during the transfer, such as power outages or accidental disconnections, can lead to incomplete transfers and data loss. Finally, undetected bad sectors on the source HDD can cause data errors during the cloning process. For example, if a bad sector contains crucial system files, the cloned system might fail to boot correctly. Therefore, a pre-transfer health check of the source HDD is strongly recommended.
Comparison of Direct Cloning and File-by-File Copy
The following table summarizes the key differences between direct cloning and file-by-file copying:
| Feature | Direct Cloning | File-by-File Copy |
|---|---|---|
| Speed | Fast | Slow |
| Complexity | Relatively Simple | More Complex |
| Control | Less Control | More Control |
| Data Integrity | High if done correctly | High if done correctly, but requires more verification steps |
| System Transfer | Transfers entire system (OS, applications, settings) | Only transfers selected files and folders; OS and applications need separate installation |
Preparing the Old HDD and New SSD
Preparing your old hard drive (HDD) and new solid-state drive (SSD) correctly is crucial for a smooth and successful data transfer. Proper preparation minimizes the risk of data loss and ensures optimal performance after the transfer. This involves checking the health of both drives and preparing the SSD to receive the data.
Preparing the old HDD for data transfer involves several important steps to ensure data integrity and a successful transfer. Neglecting these steps could lead to incomplete transfers or data corruption.
Old HDD Health Check and Preparation
Before initiating the transfer, thoroughly assess the health of your old HDD. A drive with significant errors might compromise the data transfer process. Utilize system utilities or third-party diagnostic tools to identify potential issues. These tools can scan for bad sectors, which are areas on the hard drive that are no longer readable or writable. Identifying and isolating these sectors can prevent data loss during the transfer process. Common tools include built-in Windows tools like `chkdsk` and third-party options such as CrystalDiskInfo or HD Tune. These tools provide detailed information on the drive’s health, including SMART (Self-Monitoring, Analysis and Reporting Technology) attributes, which indicate the overall condition of the drive. A thorough scan and assessment can prevent potential data loss during the transfer.
New SSD Preparation: Partitioning and Formatting
The new SSD needs to be prepared to receive the data from the old HDD. This involves partitioning and formatting the drive. Partitioning divides the SSD into logical sections, allowing for better organization and management of data. Formatting erases all existing data and prepares the drive for use with a specific file system, such as NTFS (New Technology File System) or exFAT (Extended File Allocation Table). The choice of file system depends on your operating system and the types of files you’ll be storing. NTFS is generally preferred for Windows systems due to its support for larger file sizes and advanced security features. exFAT is a good choice for external drives and devices that need to be compatible with both Windows and macOS. Before formatting, ensure you have a backup of any existing data on the SSD, as this process is destructive.
Step-by-Step Guide for Drive Health Check
The following steps Artikel a procedure for verifying the health of both the HDD and SSD before initiating the data transfer. This preventative measure ensures a smoother transfer process and reduces the risk of data loss.
- Connect both drives to your computer. This might require using external enclosures or docking stations if the drives are not internally connected.
- Run a diagnostic scan on the old HDD. Use a diagnostic tool such as CrystalDiskInfo or HD Tune to check for bad sectors and other potential issues. Pay close attention to the SMART attributes provided by the tool. Any critical errors or warnings should be addressed before proceeding.
- Run a diagnostic scan on the new SSD. Although new, it’s still beneficial to run a diagnostic scan on the new SSD to ensure it’s functioning correctly. This is a precautionary step to prevent unexpected problems during the data transfer process.
- Check drive space. Ensure the new SSD has sufficient space to accommodate all the data from the old HDD. Consider adding a buffer of 10-20% for safety.
- Review the results. Analyze the diagnostic reports from both scans. If any significant errors are found on either drive, address the issues before proceeding with the data transfer. If errors exist on the source drive (HDD), data recovery may be necessary before transferring. A faulty destination drive (SSD) should be replaced.
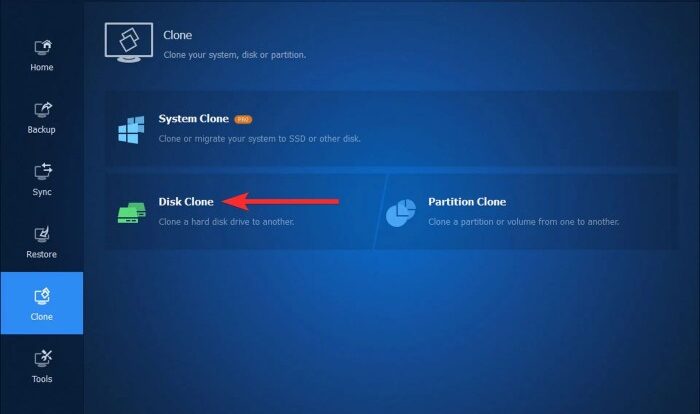
Data Transfer Methods
Direct cloning offers a streamlined approach to transferring data from an old HDD to a new SSD. This method involves creating an exact bit-by-bit copy of your hard drive’s contents onto the SSD, preserving the operating system, applications, and user data in their original state. This is often the preferred method for users who want a quick and efficient transfer without needing to reinstall everything.
Direct Cloning Procedure
To perform a direct clone, you’ll need cloning software. Popular options include Macrium Reflect, EaseUS Todo Backup, and Acronis True Image. These applications provide user-friendly interfaces and robust cloning capabilities. The specific steps may vary slightly depending on the software chosen, but the general process remains consistent. First, download and install the chosen cloning software. Then, connect both the HDD and SSD to your computer. Ensure the SSD is properly recognized by the system. Next, launch the cloning software and follow the on-screen instructions to select the source (HDD) and destination (SSD). The software will then initiate the cloning process, which may take a considerable amount of time depending on the size of your hard drive. Once complete, you can reboot your computer, potentially needing to adjust boot order in the BIOS to boot from the SSD.
Potential Issues During Cloning and Solutions
Several issues can arise during the cloning process. Insufficient space on the SSD is a common problem. Ensure the SSD has at least as much storage capacity as the used space on your HDD. If the SSD is smaller, the cloning process will fail. Another potential issue is a corrupted source drive. Running a disk check on the HDD before cloning can help identify and fix any underlying problems. Finally, hardware failures, such as a failing HDD or SSD, can also interrupt the process. Using reputable hardware and regularly monitoring its health can mitigate this risk. If a problem occurs during cloning, it is usually advisable to restart the process from the beginning, after addressing the identified issue.
Verifying Successful Cloning
After the cloning process completes, it’s crucial to verify that the data has been transferred successfully and completely. The simplest method is to reboot your computer and check if the operating system boots from the SSD. Once booted, verify that all applications and files are accessible and functional. A more thorough check involves comparing the checksums of key files or folders on both the HDD and SSD. This ensures that the bit-by-bit copy was accurate and no data corruption occurred during the cloning process. If you encounter issues after the clone, such as missing files or application malfunctions, carefully review the cloning process and consider seeking assistance from the software’s support documentation or online forums.
Data Transfer Methods
File-by-file copying offers a more granular approach to data migration compared to direct cloning. This method involves manually selecting and transferring individual files or folders from the source HDD to the destination SSD. While it might seem slower, it provides greater control and allows for selective transfers, potentially saving time and storage space.
This method is particularly useful when dealing with large hard drives containing a mix of necessary and unnecessary files. It allows you to meticulously choose which data to move, weeding out outdated or unwanted files in the process. This selective approach can be significantly more efficient than cloning the entire drive, especially if a significant portion of the old drive’s content is no longer needed.
File-by-File Copying Using Windows Explorer
Transferring data file-by-file using Windows Explorer is a straightforward process. The steps below Artikel how to perform this transfer safely and efficiently.
- Connect both the HDD and SSD to your computer. Ensure both drives are properly recognized in Windows Explorer (usually under “This PC”). Assign drive letters if necessary.
- Open Windows Explorer. Locate the drive letter representing your old HDD.
- Select the files and folders you want to transfer. You can do this by clicking and dragging to select multiple items or using the Ctrl key to select individual items. Consider creating a folder structure on the SSD mirroring that of the HDD for better organization.
- Copy the selected items. Right-click on the selected files and folders and choose “Copy”.
- Navigate to the SSD. In Windows Explorer, locate the drive letter assigned to your new SSD.
- Paste the copied items. Right-click within the SSD’s designated folder and select “Paste”. Windows will begin transferring the files.
- Monitor the progress. The transfer time will depend on the amount of data being moved and the speed of your computer’s connections. Avoid interrupting the process.
- Verify the transfer. Once the transfer is complete, verify that all files and folders have been copied correctly by comparing file sizes and modification dates. You can also open a few files to ensure their integrity.
Advantages and Disadvantages of File-by-File Copying Compared to Direct Cloning
File-by-file copying offers several advantages and disadvantages when compared to the direct cloning method.
| Feature | File-by-File Copying | Direct Cloning |
|---|---|---|
| Speed | Slower | Faster |
| Selectivity | High; allows for selective transfer | Low; transfers all data |
| Data Integrity | High; allows for individual file verification | High, but errors in the source drive are replicated |
| Storage Space | Efficient; only necessary files are transferred | Inefficient; transfers all data, including unnecessary files |
| Complexity | More complex, requires more user interaction | Simpler, less user interaction |
Creating a Detailed Log of Transferred Files
Maintaining a detailed log of transferred files is crucial for verification and troubleshooting. This can be achieved using various methods. A simple approach is to create a text file listing each file transferred, including its source path, destination path, size, and date/time of transfer. More sophisticated methods involve using specialized file synchronization tools that automatically generate logs. For increased security and accuracy, consider using a checksum verification tool to confirm the integrity of the transferred files after the transfer is complete. This will ensure that no data corruption occurred during the transfer process. This can be achieved by generating checksums (e.g., MD5 or SHA-256) for both the source and destination files and comparing the results. Any discrepancies indicate data corruption.
Data Verification and Troubleshooting
After transferring your data, it’s crucial to verify its integrity and completeness to ensure a successful migration. This step helps identify any potential issues early on, preventing data loss or corruption down the line. Thorough verification provides peace of mind and allows for prompt resolution of any problems that may arise.
Data verification involves checking that all files and folders have been transferred correctly and are accessible. Common problems during data transfer include interrupted transfers resulting in incomplete files, corrupted files due to errors during the transfer process, or simply missing files. Understanding these issues and their solutions is vital for a smooth transition.
Data Integrity Verification Methods
Several methods can be used to verify data integrity. The simplest is to manually check the size and number of files and folders on the new SSD against the original HDD. However, this method is time-consuming and prone to errors for large datasets. A more robust approach involves using checksum verification tools. These tools calculate a unique digital fingerprint (checksum) for each file. By comparing the checksums of the original and transferred files, you can definitively confirm their identicalness. Many operating systems include built-in checksum utilities, or you can use third-party tools specifically designed for this purpose. Another method is using file comparison software, which can compare the contents of files byte-by-byte to ensure they are identical. This is the most thorough method but can be resource-intensive.
Troubleshooting Common Data Transfer Problems
Interrupted transfers can leave files incomplete or corrupted. This is often caused by power outages, system crashes, or cable disconnections. If a transfer is interrupted, try resuming the transfer process if your software allows it. If this is not possible, you may need to restart the entire transfer. Corrupted files can be caused by various factors, including bad sectors on the HDD, errors in the transfer process, or viruses. Antivirus scans of both the source and destination drives are recommended. If a file is corrupted, you may need to recover it from a backup or, if no backup exists, attempt file repair tools. Missing files are often caused by errors during the copying process. Carefully review the transfer log (if available) to identify any missing files and re-transfer them.
Common Problems and Solutions
| Problem | Cause | Solution | Prevention |
| Interrupted Transfer | Power outage, system crash, cable disconnection | Resume transfer if possible; otherwise, restart the transfer. | Use a UPS (Uninterruptible Power Supply), ensure stable internet connection, and use high-quality cables. |
| Corrupted Files | Bad sectors on HDD, errors during transfer, viruses | Run a file repair tool; restore from backup; re-transfer the file. | Regularly check HDD health; use reliable transfer software; run regular antivirus scans. |
| Missing Files | Errors during copying process | Review transfer log; re-transfer missing files. | Use reliable transfer software; verify transfer completion. |
| Slow Transfer Speeds | Low disk space on destination drive, outdated drivers, bottleneck in hardware (e.g., USB 2.0) | Free up space on the SSD; update drivers; use a faster connection (e.g., SATA, NVMe). | Monitor disk space; keep drivers updated; use appropriate hardware for faster speeds. |
Post-Transfer Steps and Considerations
Successfully transferring your data is only half the battle. The next crucial steps involve configuring your new SSD as your primary drive and securely managing your old HDD. Careful planning and execution in this phase will ensure a smooth transition and protect your data.
Setting up the new SSD as the primary boot drive involves several key steps. First, you’ll need to access your computer’s BIOS or UEFI settings (usually by pressing Del, F2, F10, F12, or Esc during startup – the specific key varies by manufacturer). Within these settings, you’ll need to change the boot order, prioritizing the SSD as the primary boot device. This ensures your computer boots from the SSD containing your operating system. After making this change, save the settings and restart your computer. You may also need to use your operating system’s disk management utility to assign a drive letter to the SSD and format it if necessary (though this is usually handled automatically during the OS installation process if you’ve cloned the drive). If you performed a clean install of your OS onto the SSD, you’ll need to reinstall your applications and restore your user data.
Setting Up the New SSD as the Primary Boot Drive
This process involves accessing the BIOS/UEFI settings to change the boot order, prioritizing the SSD. After saving changes and restarting, the computer should boot from the SSD. If a clean installation was performed, applications and user data will need to be reinstalled and restored, respectively. Potential issues include incorrect boot order settings in the BIOS/UEFI, or problems with the SSD’s partitioning or formatting. Troubleshooting might involve checking cable connections, verifying the SSD is correctly detected, and consulting your motherboard’s manual.
Safely Disposing of or Securely Erasing Data on the Old HDD
Before disposing of your old HDD, it’s crucial to either securely erase the data or physically destroy the drive to prevent data breaches. Securely erasing data involves using specialized software to overwrite the drive multiple times, making data recovery extremely difficult. Several free and commercial tools are available for this purpose. Physical destruction, such as drilling holes through the platters, is a more permanent solution. However, simply deleting files is insufficient; data recovery is still possible. For sensitive data, secure erasure is essential; for less sensitive data, physical destruction might suffice, depending on your comfort level and the value of the data.
Post-Transfer Checklist
A thorough checklist ensures a smooth transition and minimizes the risk of future data loss. This checklist will help you verify that everything is working as expected and that your data is safe.
- Verify that all data has been successfully transferred to the SSD.
- Confirm the SSD is the primary boot drive.
- Test all applications and functionalities to ensure they work correctly.
- Securely erase or physically destroy the old HDD.
- Back up your data regularly to a separate location (cloud storage, external hard drive, etc.).
- Monitor your system for any unusual behavior or errors.
Illustrative Examples of Data Transfer Scenarios
Transferring data from an old HDD to a new SSD can involve various scenarios depending on the user’s needs and the amount of data involved. Understanding these different scenarios helps in planning the transfer process effectively and anticipating potential challenges. The following examples illustrate common situations and their solutions.
Transferring Specific Folders
This scenario involves transferring only selected folders or files from the HDD to the SSD, leaving the rest of the data on the HDD. This is useful when you only need to move frequently accessed programs or files to the faster SSD for improved performance, while retaining less frequently used data on the HDD for storage. For example, a user might only transfer their operating system, frequently used applications, and essential documents to the SSD, keeping games, videos, and less frequently used files on the HDD. The selection process is typically straightforward using file explorer or similar tools. The user would simply navigate to the desired folders, select them, and copy them to the designated location on the SSD. This targeted approach saves time and storage space on the SSD.
Transferring a Large Amount of Data Using a Segmented Approach
Transferring a large amount of data (terabytes) can take a considerable amount of time. A segmented approach divides the data into smaller, more manageable chunks, allowing for a more efficient transfer process and reducing the risk of interruptions. For example, a user with 2TB of data might choose to transfer the data in 500GB segments. Each segment is transferred individually, allowing the user to pause and resume the process without losing the transferred data. This is especially beneficial if there are power outages or other unforeseen interruptions. Monitoring the progress of each segment allows for better management of the overall transfer process.
Recovering Data After a Failed Transfer
A failed transfer can occur due to various reasons, including hardware malfunctions, software errors, or power outages. In such scenarios, data recovery is crucial. For instance, imagine a user attempting to transfer their entire HDD to a new SSD, but the process abruptly stops due to a sudden power failure halfway through. The user may find some data transferred, while others are inaccessible. In this situation, several recovery methods can be attempted. First, check the SSD for any transferred data. If some data is present, it may be possible to resume the transfer. If the transfer is completely unsuccessful, data recovery software can be used to scan the HDD and recover lost files. It’s crucial to avoid writing any new data to the HDD to increase the chances of successful recovery. Data recovery software often uses sophisticated algorithms to reconstruct files, but the success rate depends on the severity of the failure and the type of storage media involved. Professional data recovery services can be utilized for complex cases.