Understanding Data Corruption
Data corruption on a hard drive refers to the alteration or destruction of data stored on the drive, rendering it inaccessible or unusable. This can range from minor glitches to complete data loss, significantly impacting the functionality of the drive and the integrity of your files. Understanding the types, causes, and symptoms of data corruption is crucial for effective data recovery.
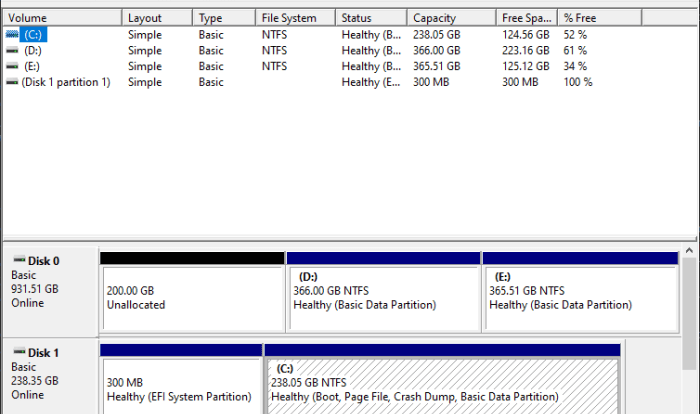
Data corruption manifests in various ways, impacting the usability and integrity of your stored information. It’s a critical issue that can lead to significant data loss if not addressed properly.
Types of Hard Drive Data Corruption
Hard drive data corruption can be broadly categorized into logical and physical corruption. Logical corruption affects the file system’s ability to locate and interpret data, while physical corruption involves damage to the physical components of the hard drive itself. These distinctions are important because they dictate the approach to recovery. Logical corruption is often more easily recoverable than physical corruption.
Common Causes of Hard Drive Failure Leading to Data Corruption
Several factors contribute to hard drive data corruption and subsequent failure. These include physical damage (such as drops or impacts), malfunctioning hardware components (e.g., failing read/write heads, damaged platters), power surges or outages, software errors (including operating system crashes and virus infections), bad sectors (areas on the disk that are physically damaged and cannot reliably store data), and excessive heat. The accumulation of bad sectors, for instance, can significantly hinder the drive’s ability to read and write data accurately. These factors often interact, making pinpointing a single cause challenging.
Symptoms Indicating Hard Drive Data Corruption
Recognizing the signs of data corruption is crucial for timely intervention. Common symptoms include the inability to access files, files appearing as empty or corrupted, the appearance of error messages during file access, the system freezing or crashing frequently, slow boot times, and a noticeable decline in overall system performance. The presence of these symptoms often warrants a thorough examination of the hard drive’s health and integrity. Early detection can increase the chances of successful data recovery.
Comparison of Data Corruption Types and Causes
| Type of Corruption | Description | Likely Causes | Examples |
|---|---|---|---|
| Logical Corruption | Errors in the file system’s metadata, making files inaccessible or unreadable. | Software errors, virus infections, improper shutdown, file system inconsistencies. | Files showing as 0KB, error messages when opening files, inability to boot the operating system. |
| Physical Corruption | Physical damage to the hard drive’s components, preventing data access. | Physical damage (drops, impacts), head crashes, bad sectors, manufacturing defects. | Clicking noises from the hard drive, drive not recognized by the system, consistent read/write errors. |
| Firmware Corruption | Damage to the hard drive’s firmware, affecting its basic operations. | Power surges, firmware updates gone wrong, hardware failure. | Drive not spinning up, drive not detected by BIOS, unusual error codes. |
| Media Corruption | Damage to the physical storage media (platters), resulting in data loss. | Physical damage, head crashes, age and wear, exposure to extreme temperatures. | Irrecoverable read errors, large numbers of bad sectors, gradual data loss. |
Data Recovery Tools and Software
Data recovery software can significantly aid in retrieving lost data from a corrupted hard drive. These tools employ various techniques to scan the drive’s sectors, identify recoverable files, and reconstruct them. Choosing the right tool depends on the extent of the corruption and your technical expertise. While professional-grade software offers advanced features, several free and open-source options provide surprisingly effective results for less severe data loss scenarios.
Free and Open-Source Data Recovery Tools
Several free and open-source data recovery tools are available, offering a viable alternative to expensive commercial software. These tools, while often lacking some advanced features of their paid counterparts, can be surprisingly effective in recovering data from various types of storage media, including hard drives. However, it’s crucial to understand their limitations and use them cautiously to avoid further data corruption.
Here’s a list of some noteworthy options:
- TestDisk: A powerful command-line utility capable of recovering lost partitions and making non-bootable drives bootable again. It’s particularly useful when the partition table is damaged.
- PhotoRec: A companion tool to TestDisk, PhotoRec focuses specifically on recovering various file types, including images, videos, and documents. It’s known for its ability to recover data even when file systems are severely damaged.
- Recuva (Free Version): While the full version is paid, Recuva’s free version provides a robust set of features for recovering deleted files from various storage devices. It offers a user-friendly graphical interface.
Features, Limitations, and Usage of Selected Tools
Let’s delve into the installation and usage procedures for TestDisk, PhotoRec, and the free version of Recuva.
TestDisk
TestDisk is a powerful, albeit command-line based, tool. Its installation typically involves downloading the appropriate binary for your operating system and running the executable. Usage requires navigating the command line interface, which might be challenging for users unfamiliar with this environment. Its strength lies in its ability to repair damaged partition tables, a critical step before attempting data recovery in many cases. However, its command-line interface presents a significant barrier to entry for many users. A mistake in using TestDisk could potentially lead to further data loss.
PhotoRec
PhotoRec works seamlessly alongside TestDisk, often used after TestDisk has repaired a damaged partition table. The installation is similar to TestDisk. Its usage involves selecting the drive and file system, then specifying the file types to recover. It operates in a more automated fashion than TestDisk, making it relatively easier to use, even for less technically proficient users. However, it lacks the advanced partition repair capabilities of TestDisk.
Recuva (Free Version)
Recuva’s free version provides a user-friendly graphical interface. Installation is straightforward, involving a simple installer download and execution. Its usage involves selecting the drive to scan and choosing the file types to recover. Recuva offers a preview function, allowing users to check the integrity of recoverable files before saving them. However, the free version may lack some advanced features like deep scan capabilities found in its paid counterpart.
Comparison of Data Recovery Software
The following table summarizes the strengths and weaknesses of the discussed tools.
| Software | Strengths | Weaknesses | Ease of Use |
|---|---|---|---|
| TestDisk | Powerful partition repair, command-line flexibility | Steep learning curve, command-line interface, potential for errors | Difficult |
| PhotoRec | Effective file recovery, user-friendly compared to TestDisk | Lacks partition repair capabilities, limited file type support compared to some commercial software | Moderate |
| Recuva (Free) | User-friendly interface, preview function, easy installation | Limited deep scan capabilities, fewer advanced features compared to paid version | Easy |
DIY Data Recovery Methods
Attempting DIY hard drive data recovery can be risky, potentially leading to further data loss if not done correctly. However, for those comfortable with technical tasks and willing to accept the risk, several methods exist. These methods offer a cost-effective alternative to professional data recovery services, but success is not guaranteed. Always back up your data regularly to mitigate the impact of future failures.
Data Recovery Using the chkdsk Command
The `chkdsk` (check disk) command is a built-in Windows utility designed to check the file system for errors and attempt repairs. While primarily used for preventative maintenance, it can sometimes recover data from mildly corrupted drives. It’s crucial to understand that `chkdsk` might not recover all lost data, and attempting to use it on severely damaged drives could worsen the situation.
- Identify the Drive Letter: Determine the drive letter assigned to your corrupted hard drive in Windows Explorer (e.g., D:, E:, etc.).
- Open Command Prompt as Administrator: Search for “cmd” in the Windows search bar, right-click on “Command Prompt,” and select “Run as administrator.”
- Run chkdsk: Type the following command, replacing `X:` with your drive letter, and press Enter:
chkdsk X: /f /rThe `/f` parameter fixes errors on the disk, and the `/r` parameter locates bad sectors and recovers readable information. - Wait for Completion: The process can take a considerable amount of time, depending on the drive’s size and the extent of corruption. Do not interrupt the process.
- Check for Recovered Data: Once `chkdsk` completes, check the drive for recovered files. They might be located in their original folders or in a newly created folder.
Data Recovery Using TestDisk
TestDisk is a powerful open-source data recovery utility available for Windows, macOS, and Linux. It’s capable of recovering lost partitions and making non-bootable drives accessible again. It’s a command-line tool, but its interface is relatively user-friendly. Remember that improper use can lead to further data loss, so proceed cautiously and understand each step before executing it.
- Download and Install TestDisk: Download the appropriate version for your operating system from the official TestDisk website. Ensure you download it from a trusted source.
- Run TestDisk: Launch the TestDisk application. You’ll be presented with a text-based interface.
- Select the Drive: Use the arrow keys to select the corrupted hard drive and press Enter.
- Choose a Partition Table Type: TestDisk will attempt to automatically detect the partition table type (e.g., Intel, GPT). If it’s incorrect, you may need to select the correct type manually.
- Analyze and Recover: Follow the on-screen instructions to analyze the drive and search for lost partitions. TestDisk will present a list of found partitions. Select the partition containing your data and choose the “Proceed” option to recover it.
- Write the Changes: After the recovery process, TestDisk will ask if you want to write the changes. Exercise extreme caution here. Incorrectly writing changes can permanently damage your data. Only proceed if you are confident in the changes.
- Copy Recovered Data: Once the changes are written (if you chose to do so), copy the recovered data to a different, healthy drive to prevent further data loss.
Data Recovery Using Data Recovery Software (e.g., Recuva)
Several data recovery software applications offer a user-friendly graphical interface, simplifying the recovery process. Recuva is a popular free option for Windows. These tools scan the hard drive for deleted or lost files, allowing you to preview and recover them. However, the success rate depends on the extent of the damage and the type of data loss. Installing the software on the same drive as the corrupted drive is generally not recommended.
- Download and Install Data Recovery Software: Download and install the chosen data recovery software (e.g., Recuva) onto a healthy drive. Avoid installing it on the corrupted drive.
- Select the Drive: Launch the software and select the corrupted hard drive as the target.
- Perform a Scan: Initiate a deep scan of the drive. This process can take a significant amount of time, depending on the drive’s size and the level of corruption.
- Preview and Recover: Once the scan is complete, the software will display a list of recoverable files. Preview the files to ensure they are intact before recovering them. Save the recovered files to a different, healthy drive.
Advanced Techniques
For severely corrupted hard drives, basic recovery methods may prove insufficient. This section delves into more advanced techniques requiring specialized tools and a deeper understanding of data storage. These methods carry a higher risk of further data loss if not executed correctly, so proceed with caution and ideally back up any recovered data immediately.
Using a Data Recovery Image
Creating a bit-by-bit image of the corrupted hard drive is crucial for advanced recovery. This image acts as a copy of the drive’s contents, allowing you to work on the image file without risking further damage to the original drive. Specialized software is needed to create these images; they are typically larger than the original drive’s capacity due to the inclusion of all sectors, including bad ones. Once the image is created, data recovery software can analyze it and attempt to recover files. The process involves selecting the source drive (the corrupted one), choosing a destination for the image file (a large external drive or ample hard drive space), and initiating the imaging process. The software will read every sector of the drive, regardless of its condition, creating a complete replica. This replica can then be analyzed and files recovered from it using various recovery tools.
Cloning a Hard Drive
Hard drive cloning involves creating an exact copy of the source drive onto a target drive. Unlike imaging, which creates a file, cloning creates a bootable duplicate. This is beneficial when the operating system on the original drive is compromised. The cloning process typically uses specialized software that creates a sector-by-sector copy. This ensures that all data, even from damaged sectors, is transferred to the new drive. The cloned drive can then be used to boot a computer and access the data, or as a source for data recovery software. The process involves connecting both the source (corrupted) and target (new) drives to the computer, selecting the source and target drives in the cloning software, and initiating the cloning process. It is crucial to ensure the target drive has at least the same capacity as the source drive.
Sector-by-Sector Data Recovery
Sector-by-sector recovery involves reading and analyzing each sector of the hard drive individually. This is the most comprehensive but also the slowest and most resource-intensive method. It’s often used as a last resort when other methods fail, especially for drives with extensive physical damage. This technique is performed using specialized data recovery software that can read data from bad sectors, attempting to reconstruct lost files. The software will scan each sector, looking for file signatures and data fragments. It then attempts to piece these fragments together to reconstruct files. This method can be extremely time-consuming, potentially taking days or even weeks for large drives. The success rate depends on the extent of the damage and the software’s capabilities.
Choosing an Appropriate Recovery Method
The decision of which recovery method to employ depends on several factors, including the severity of the corruption, the available tools, and the user’s technical expertise. The following flowchart illustrates this decision-making process.
Precautions and Considerations
Attempting DIY hard drive data recovery can be a risky endeavor, potentially leading to further data loss or irreversible damage to the drive if not approached cautiously. Understanding the potential pitfalls and taking necessary precautions is crucial before embarking on any recovery attempts. This section Artikels critical safety measures and considerations to mitigate risks and maximize your chances of successful data retrieval.
Data recovery, especially from a corrupted hard drive, is a delicate process. Improper handling can easily worsen the existing damage, rendering your data unrecoverable. Even with the best intentions, mistakes are easily made, especially for those without extensive technical expertise. Therefore, a methodical and careful approach is paramount.
Potential Risks of DIY Data Recovery
DIY data recovery carries inherent risks. These risks stem from the potential for accidental data overwriting, further physical damage to the drive’s components (such as the read/write heads), and the possibility of installing malicious software disguised as recovery tools. Incorrectly using data recovery software can corrupt the file system beyond repair, leading to complete data loss. For example, attempting to recover data from a drive with severe physical damage might cause the read/write heads to scratch the platters, irrevocably destroying more data. Downloading recovery tools from untrusted sources can introduce malware that compromises your system and further jeopardizes your data.
Importance of Data Backups
Regular data backups are the single most effective way to prevent data loss from hard drive failure or corruption. Backups serve as a safety net, providing a readily available copy of your important files in case of unforeseen circumstances. There are several backup strategies, including local backups (to an external hard drive or USB drive), cloud backups (using services like Google Drive, Dropbox, or Backblaze), and network backups (to a network-attached storage device or NAS). A robust backup strategy should include multiple backups stored in different locations to safeguard against multiple points of failure, such as fire or theft. For instance, a user who regularly backs up their photos to both a cloud service and an external hard drive stored off-site is far less likely to experience permanent data loss than a user with no backup strategy.
Best Practices for Preventing Hard Drive Failures
Preventing hard drive failures involves a combination of proactive measures and careful usage. This includes regularly running a disk check utility to identify and repair bad sectors, avoiding sudden power outages or abrupt system shutdowns (using a UPS is recommended), and keeping the hard drive cool and free from physical shocks or vibrations. Regularly defragmenting the hard drive (for HDDs, less critical for SSDs) can improve performance and reduce the risk of data corruption. Monitoring the hard drive’s SMART (Self-Monitoring, Analysis and Reporting Technology) attributes can provide early warnings of potential problems. Finally, upgrading to a Solid State Drive (SSD) can significantly reduce the risk of mechanical failure compared to traditional Hard Disk Drives (HDDs).
Illustrative Examples

Real-world scenarios can best illustrate the effectiveness and limitations of DIY hard drive data recovery. The following examples highlight successful recoveries, failures, and the lessons learned from each experience. Remember that attempting data recovery yourself carries inherent risks, and professional assistance may be necessary in complex cases.
Successful Data Recovery Using Disk Drill
Successful Recovery of Photos from a Dropped Laptop Hard Drive
A user accidentally dropped their laptop, resulting in a clicking noise from the hard drive and subsequent data inaccessibility. Suspecting a head crash, they cautiously removed the hard drive and connected it to an external enclosure. Using the free version of Disk Drill data recovery software, they scanned the drive. The scan identified numerous files, including a large number of irreplaceable family photos. The user then purchased the full version of Disk Drill to recover the photos. The recovery process took several hours, depending on the size of the drive and the number of files to be recovered. The software successfully recovered over 95% of the photos, with only a few minor files showing corruption. The user was able to save the recovered files to a new external hard drive, preserving their precious memories. This example showcases how readily available software can successfully recover data even after physical damage, provided the damage is not too extensive.
Data Recovery from a Hard Drive with Logical Errors
A user experienced slow boot times and frequent system crashes. After running diagnostics, they suspected logical errors on their hard drive. They chose to attempt recovery using the built-in Windows chkdsk utility. This command-line tool checks for and attempts to repair file system errors. After running chkdsk /f /r (which checks for and fixes errors and attempts to recover bad sectors), the system rebooted and functioned normally. Although some minor data loss was reported by the utility, the vast majority of the user’s files remained intact and accessible. This scenario demonstrates that simple built-in tools can sometimes effectively resolve data accessibility issues caused by logical errors, avoiding more complex and potentially risky DIY methods.
Failed Data Recovery Attempt Due to Advanced Physical Damage
A user’s hard drive emitted a loud grinding noise and failed to boot. They attempted to recover data using a DIY method involving opening the drive case and carefully removing the platters. However, the drive showed significant physical damage to the read/write heads, resulting in scratches on the platters. The user, lacking the clean-room environment and specialized tools necessary for this procedure, inadvertently caused further damage. No data was successfully recovered. This example underscores the dangers of attempting advanced DIY methods without the proper skills, tools, and environment. The damage incurred in this case made professional data recovery prohibitively expensive, highlighting the importance of careful assessment before undertaking complex procedures.