Processor Selection for Budget High-Performance PC
Choosing the right processor is crucial for a budget-friendly PC capable of handling video editing and 3D rendering. The CPU forms the heart of your system, directly impacting rendering times and overall responsiveness. A balanced approach, considering both price and performance, is key to achieving optimal results within your budget.
CPU Comparison for Video Editing and 3D Rendering
The following table compares several suitable CPUs available under $200, focusing on their relevance to video editing and 3D rendering workloads. Benchmark scores are approximate and can vary based on specific testing configurations. Remember to check the latest benchmarks from reputable sources before making your purchase.
| CPU Model | Clock Speed (GHz) | Core Count/Threads | Cinebench R23 Multi-Core Score (Approximate) |
|---|---|---|---|
| AMD Ryzen 5 5600 (Example) | 3.5 GHz (Boost up to 4.4 GHz) | 6 Cores/12 Threads | 10000-12000 |
| Intel Core i5-12400 (Example) | 2.5 GHz (Boost up to 4.4 GHz) | 6 Performance Cores/4 Efficient Cores/12 Threads | 9500-11000 |
| AMD Ryzen 3 5300G (Example – Integrated Graphics) | 3.8 GHz (Boost up to 4.2 GHz) | 4 Cores/8 Threads | 6000-7500 |
| Intel Core i3-12100 (Example) | 3.3 GHz (Boost up to 4.3 GHz) | 4 Performance Cores/2 Efficient Cores/8 Threads | 5500-6500 |
Single-Core vs. Multi-Core Performance
For video editing and 3D rendering, both single-core and multi-core performance are important, but their relative significance varies depending on the specific task. Single-core performance impacts responsiveness and the speed of individual operations, crucial for real-time previewing and smoother workflow. Multi-core performance significantly accelerates rendering times, especially for complex scenes or high-resolution videos. A balance of both is ideal for a smooth and efficient editing and rendering experience. A higher single-core clock speed can improve real-time performance, while a higher core count accelerates rendering.
Impact of CPU Architectures (AMD vs. Intel)
AMD and Intel CPUs both offer viable options for video editing and 3D rendering. AMD Ryzen processors often provide a strong price-to-performance ratio, particularly in multi-core performance, making them attractive for rendering-intensive tasks. Intel processors, while sometimes more expensive at comparable core counts, can sometimes offer a slight edge in single-core performance, benefiting real-time responsiveness in video editing software. The best choice depends on the specific budget and workload priorities. For example, a project with many complex 3D renders might benefit from a higher core count AMD CPU, while a project focusing on quick turnaround editing might prioritize an Intel CPU with a higher single-core clock speed.
Graphics Card Selection for Budget High-Performance PC
Choosing the right graphics card (GPU) is crucial for a budget-friendly PC build capable of handling video editing and 3D rendering. The GPU significantly impacts rendering speed and overall system responsiveness. This section will guide you through selecting a suitable GPU within a $300 budget, considering both performance and VRAM capacity.
Suitable GPUs Under $300
Selecting a GPU under $300 requires careful consideration of the balance between price and performance. Prioritizing VRAM capacity is especially important for video editing and 3D rendering, as larger projects require more memory to operate smoothly. While specific pricing fluctuates, the following examples illustrate GPUs that often fall within this price range and are suitable for the intended tasks. Remember to check current market prices before purchasing.
- AMD Radeon RX 6600: This card typically offers a good balance of performance and VRAM (8GB). Benchmarks show it capable of handling 1080p video editing and moderately complex 3D rendering tasks. Its performance can vary depending on the specific model and manufacturer.
- NVIDIA GeForce RTX 3050: The RTX 3050 usually comes with 8GB of VRAM and offers decent performance for its price point. While not as powerful as higher-end cards, it can still handle 1080p video editing and simpler 3D rendering projects effectively. Ray tracing capabilities are limited compared to more expensive options.
- AMD Radeon RX 6500 XT: This card offers a more budget-friendly option, often available below $200. However, it has only 4GB of VRAM, which might be limiting for larger projects. It’s suitable for lighter video editing and 3D rendering tasks, but users should be mindful of potential VRAM limitations.
NVIDIA vs. AMD GPU Architectures and Rendering Times
NVIDIA and AMD employ different GPU architectures that impact rendering performance in distinct ways. NVIDIA’s Ampere and Ada Lovelace architectures often excel in ray tracing and AI-accelerated features, potentially offering advantages in certain 3D rendering applications that utilize these technologies. AMD’s RDNA 2 architecture, found in cards like the RX 6600, generally provides strong raw rendering power at a competitive price point, often making it a preferable choice for budget-conscious users. The actual rendering time difference between comparable NVIDIA and AMD GPUs within the same price bracket is usually marginal for video editing and many 3D rendering tasks, with variations depending on the specific software and project complexity.
VRAM Capacity and Smooth Performance
VRAM (Video RAM) is the GPU’s dedicated memory. In demanding applications like video editing and 3D rendering, large projects require significant VRAM to store textures, models, and other data. Insufficient VRAM leads to slowdowns, stuttering, and even crashes as the GPU constantly swaps data between VRAM and system RAM (which is much slower). For example, a 4GB VRAM card might struggle with high-resolution video editing or complex 3D scenes, resulting in significantly longer rendering times and a less fluid workflow. 8GB or more is generally recommended for smoother performance in these applications, especially for projects involving high-resolution textures or intricate models. For instance, editing a 4K video with numerous effects will require considerably more VRAM than editing a 1080p video with basic edits.
RAM and Storage Selection for Budget High-Performance PC
Building a budget-friendly PC for video editing and 3D rendering requires careful consideration of RAM and storage. These components directly impact your system’s responsiveness and overall workflow efficiency. Choosing the right balance between performance and cost is key to maximizing your budget.
Optimal RAM for Video Editing and 3D Rendering
For video editing and 3D rendering under $1000, 16GB of DDR4 RAM is the sweet spot. While 8GB might suffice for simpler projects, demanding tasks like 4K video editing or complex 3D scenes will quickly overwhelm a smaller amount of RAM, leading to significant slowdowns and potential crashes. 16GB provides ample space for the operating system, applications, and project files to reside in memory simultaneously, resulting in smoother performance and faster rendering times. Upgrading to 32GB would offer further benefits, but it significantly impacts the budget, making 16GB the more practical choice for this price range. Consider a speed of at least 3200MHz for optimal performance.
SSD vs. HDD: Speed, Cost, and Capacity Comparison
The choice between Solid State Drives (SSDs) and Hard Disk Drives (HDDs) significantly affects workflow efficiency. SSDs offer significantly faster read and write speeds compared to HDDs, leading to faster boot times, application loading, and file access. This translates to noticeable improvements in video editing and 3D rendering, where large files are constantly being accessed and processed. However, SSDs are typically more expensive per gigabyte than HDDs. HDDs, while slower, provide much higher storage capacity at a lower cost. A balanced approach is often best, utilizing an SSD for the operating system and frequently accessed applications, while using an HDD for mass storage of project files.
| Feature | SSD | HDD |
|---|---|---|
| Speed | Very Fast (Read/Write speeds in hundreds of MB/s) | Slow (Read/Write speeds in tens of MB/s) |
| Cost per GB | High | Low |
| Capacity | Typically lower capacity options, but increasing | Typically higher capacity options available |
Impact of Storage Choice on Workflow Efficiency
Using an SSD for your operating system and applications dramatically reduces load times, making the overall system more responsive. This is particularly beneficial in video editing where you’re constantly switching between applications, previewing footage, and applying effects. For 3D rendering, the faster access speeds of an SSD reduce the time spent waiting for files to load, allowing you to focus more on the creative process. While an HDD can store your large project files, the SSD’s speed ensures that the editing and rendering processes themselves are as efficient as possible. A 500GB or 1TB NVMe SSD for the OS and frequently used programs, coupled with a 2TB HDD for project files, represents a good balance of speed and capacity for this budget build. This configuration provides the speed improvements of an SSD without breaking the bank.
Motherboard and Power Supply Selection for Budget High-Performance PC
Choosing the right motherboard and power supply is crucial for a stable and efficient build. These components form the foundation of your system, connecting all the parts and providing the necessary power. A poorly chosen motherboard can limit your upgrade options, while an insufficient power supply can lead to instability or even damage.
Motherboard Selection Criteria
The motherboard must be compatible with your chosen CPU and RAM. This means checking the socket type for the CPU (e.g., AM4, LGA 1700) and the RAM type (e.g., DDR4, DDR5). Beyond compatibility, look for features that enhance performance and expandability. A robust chipset, such as a B650 or B760 for AMD and Intel respectively, offers better performance and more features compared to lower-end chipsets. Sufficient expansion slots (PCIe x16 for the GPU, PCIe x4 or x1 for other expansion cards) are also important, especially if you plan on adding additional devices in the future. Finally, ensure the motherboard has enough SATA ports for your storage devices.
Power Supply Wattage Requirements
Determining the minimum wattage for your power supply requires careful consideration of the power consumption of all your components. Online calculators can help estimate this, but it’s wise to add a safety margin of 20-30%. For example, if your estimated power consumption is 400W, aim for a 500-550W power supply to ensure stability, especially under heavy load during 3D rendering. A higher wattage PSU also allows for future upgrades without needing to replace the power supply. Efficiency is also key; look for a PSU with an 80+ Bronze or higher rating to minimize energy waste and heat generation.
Compatible Motherboard and PSU Options
Considering a budget of under $1000, a good balance of performance and price is essential. For example, a motherboard like the MSI B650 Tomahawk WIFI (for AMD Ryzen CPUs) or the Gigabyte B760 AORUS ELITE AX (for Intel CPUs) offers a great combination of features and affordability. These motherboards typically support the latest CPU technologies, provide multiple PCIe slots, and have sufficient SATA ports. For the power supply, a 650W 80+ Gold rated PSU from a reputable brand like Corsair or EVGA would provide ample power for the system and leave room for future upgrades. This wattage is sufficient for most builds under $1000 targeting high-performance tasks like video editing and 3D rendering. Choosing a higher-quality PSU with a good warranty is a worthwhile investment to protect your system.
Case and Cooling for Budget High-Performance PC
Maintaining optimal temperatures within your PC case is crucial for sustained high performance. Overheating leads to thermal throttling, a process where the CPU or GPU automatically reduces its clock speed to prevent damage, resulting in significant performance drops. Choosing the right case and cooling solution is therefore a critical aspect of building a budget-friendly yet powerful machine. This section will explore suitable case designs and cooling options to ensure your components operate at peak efficiency.
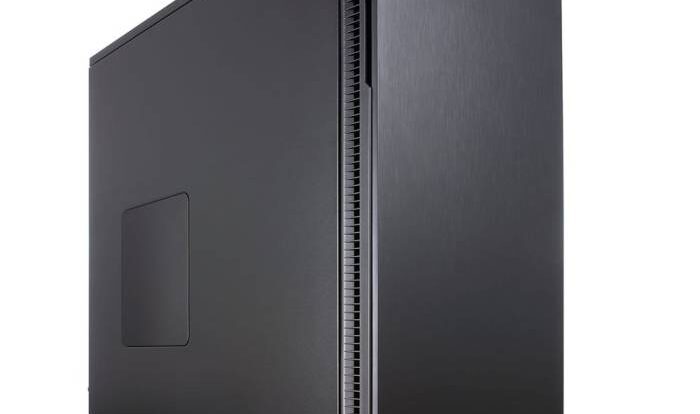
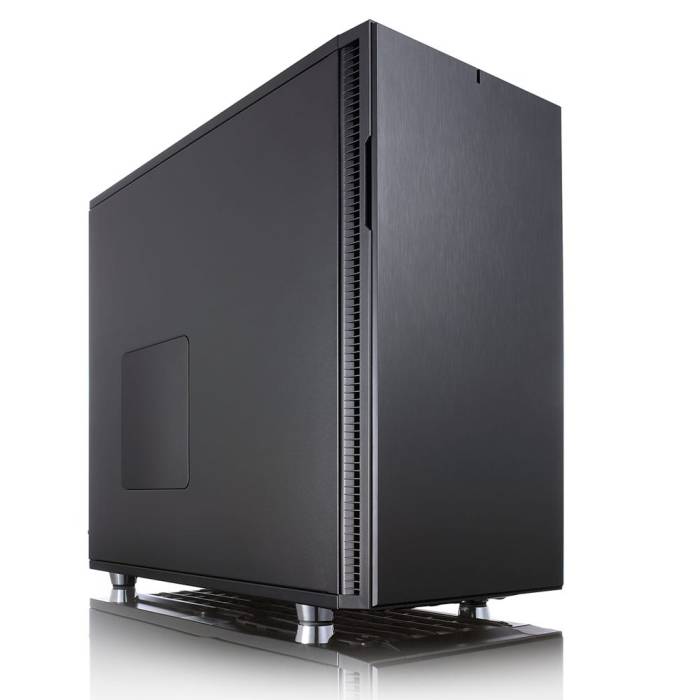
Case Design for Airflow
Effective case airflow is paramount for preventing overheating. Cases with well-designed ventilation, including ample intake and exhaust fans, are essential. Look for cases with mesh front panels, which allow for unrestricted airflow directly to your components. Cases with strategically placed vents on the top and side panels also aid in exhausting hot air. A good example would be a case with a full-mesh front panel, multiple fan mounts (at least two intake and one exhaust), and good cable management features to ensure air isn’t obstructed. These features allow for a constant flow of cool air over the components, drawing hot air out efficiently. Another example would be a case with a perforated top panel and a rear-mounted exhaust fan, ensuring that heat generated by the CPU and GPU is quickly dissipated.
Air vs. Liquid Cooling
Air cooling, using heat sinks and fans, is generally sufficient for a budget build, especially if you’ve chosen components with relatively low TDP (Thermal Design Power). Air coolers are readily available, affordable, and easy to install. However, for high-end CPUs or GPUs that generate significant heat, a liquid cooling system (AIO or custom loop) might be necessary to maintain optimal temperatures. AIO (All-in-One) liquid coolers are pre-assembled units with a radiator, pump, and fan, offering a relatively easy installation process and decent cooling performance. They are a good balance between performance and ease of use for a budget build. Custom liquid cooling loops offer superior cooling capabilities but require more technical expertise, significant investment in components, and time for assembly. Given the budget constraints of this build, a high-quality air cooler would be the most practical and cost-effective solution for most users, unless a particularly high-TDP CPU is selected.
Peripherals and Software Considerations
Building a high-performance PC for video editing and 3D rendering is only half the battle. The right peripherals and software are crucial for maximizing your system’s potential and ensuring a comfortable workflow. Investing wisely in these areas will significantly impact your productivity and overall experience.
Essential Peripherals for Video Editing and 3D Rendering
Choosing the right peripherals is vital for efficiency and comfort. A poor setup can lead to strain and reduced productivity. The following recommendations prioritize cost-effectiveness without compromising on quality necessary for professional-level work.
- Monitor: A 24-inch or larger monitor with a resolution of at least 1920×1080 (1080p) is recommended. For better color accuracy crucial for video editing, consider an IPS panel. While higher resolutions like 1440p or 4K are desirable, they significantly increase costs; a 1080p IPS monitor offers a great balance of quality and affordability. Look for features like adjustable height and tilt for optimal ergonomics.
- Keyboard: A mechanical keyboard offers superior responsiveness and durability compared to membrane keyboards. While some higher-end mechanical keyboards can be expensive, several affordable options provide excellent performance. Look for a keyboard with comfortable key travel and a layout that suits your preferences. A tenkeyless (TKL) keyboard can save desk space without sacrificing functionality.
- Mouse: A wired or wireless ergonomic mouse is essential for preventing hand strain during long work sessions. Consider a mouse with adjustable DPI (dots per inch) for precise control in both video editing and 3D modeling applications. Look for models that fit comfortably in your hand and offer customizable buttons for shortcuts.
Operating System and Software Selection
The operating system and software you choose will heavily influence your workflow. The right combination ensures optimal performance and avoids unnecessary costs.
For operating systems, Windows remains the dominant platform for video editing and 3D rendering software. While macOS offers some professional-grade options, its higher cost and limited compatibility might make it less suitable for budget builds. A clean installation of Windows can be achieved cost-effectively by purchasing a license key online from reputable sources.
Regarding software, free and open-source options exist, but they often lack the features and performance of commercial alternatives. For video editing, consider exploring free trials of industry-standard software like DaVinci Resolve (offers a free version with many professional features) before committing to a paid subscription. For 3D rendering, Blender is a powerful, free, and open-source option, offering a vast array of tools. However, if you need specific features or advanced capabilities, you might consider a trial of commercial software like Cinema 4D or 3ds Max, which often come with hefty price tags but are worth considering if your project requires them.
Ergonomic Setup for Comfortable Work
Maintaining a comfortable and ergonomic setup is paramount to avoid strain and injury during long work sessions. This involves thoughtful consideration of your posture, monitor placement, and peripheral arrangement.
Your monitor should be positioned at eye level to prevent neck strain. Ensure your keyboard and mouse are within easy reach, promoting a neutral wrist posture. Consider using an ergonomic chair with lumbar support to maintain proper back posture. Regular breaks and stretches are crucial to prevent fatigue and maintain focus throughout the day. Investing in a good chair might seem like an unnecessary expense, but the long-term benefits to your health and productivity outweigh the initial cost. For example, investing in a well-regarded ergonomic chair like the Herman Miller Aeron (though expensive) prevents long-term health problems that are far more costly to address later. More affordable alternatives exist, but prioritize good back support and adjustability.
Budget Optimization Strategies
Building a high-performance PC under $1000 requires careful planning and strategic compromises. This section explores practical techniques to maximize performance while minimizing costs, highlighting the trade-offs inherent in budget PC building. We’ll examine specific component choices and provide a sample build to illustrate these strategies.
Prioritizing Component Selection is crucial for effective budget allocation. Understanding the relative impact of each component on overall system performance allows for informed decisions. For instance, a slightly older, yet still powerful, CPU paired with a high-end GPU might be a more cost-effective approach than the reverse for video editing and 3D rendering workloads.
Component Prioritization for Performance
The most impactful components for video editing and 3D rendering are the CPU and GPU. Investing more in these areas will yield the greatest performance gains. RAM is also crucial, especially for larger projects. Therefore, allocating a larger portion of the budget to these three components is advisable. Storage, while important, can often be optimized by using a combination of fast NVMe SSDs for the operating system and frequently accessed programs, and a larger, less expensive HDD for storage. The motherboard and power supply are less critical for performance, provided they meet the minimum requirements of the chosen components. Cutting costs here is often a viable strategy.
Trade-offs in Component Selection
Choosing between different components involves evaluating the performance-to-price ratio. For example, opting for a slightly older generation CPU might save money, but it might require a more powerful GPU to compensate for any performance deficit. Similarly, choosing a faster RAM kit with higher latency might offer a marginal performance improvement compared to a slower kit with lower latency at a lower cost. These trade-offs must be carefully weighed against the specific needs and budget.
Sample Budget Build List
This sample build list demonstrates a practical approach to budget allocation, prioritizing performance while remaining under $1000. Prices are estimates and may vary depending on retailer and sales. This build is optimized for video editing and 3D rendering tasks.
| Component | Component Description | Estimated Price (USD) |
|---|---|---|
| CPU | AMD Ryzen 5 5600X | $150 |
| CPU Cooler | Cooler Master Hyper 212 Evo | $30 |
| GPU | AMD Radeon RX 6600 XT | $250 |
| Motherboard | B550 Motherboard (e.g., MSI B550-A PRO) | $100 |
| RAM | 16GB DDR4-3200MHz | $60 |
| SSD | 1TB NVMe SSD | $80 |
| HDD | 2TB HDD | $50 |
| Power Supply | 650W 80+ Bronze | $70 |
| Case | Mid-Tower ATX Case | $50 |
| Total Estimated Cost | $840 |
Note: This build leaves room for potential savings or upgrades based on individual needs and available sales. Prices are approximate and may vary.