High Refresh Rate Gaming PCs Under $1500

The allure of smooth, responsive gameplay is undeniable. High refresh rate monitors, capable of displaying significantly more frames per second (fps) than traditional 60Hz displays, unlock a new level of immersion and competitive edge in gaming. However, building a PC capable of consistently driving these high refresh rates while staying within a $1500 budget presents a unique challenge, requiring careful component selection and optimization. This guide explores the possibilities and strategies for achieving this goal.
High refresh rate monitors, typically ranging from 144Hz to 240Hz or even higher, drastically reduce motion blur and input lag. This translates to a more fluid and responsive gaming experience, providing a significant advantage in fast-paced games where quick reactions are crucial. The difference between a 60Hz and a 144Hz monitor is immediately noticeable, resulting in a smoother, more enjoyable gaming experience. The improved clarity and responsiveness enhance gameplay precision and overall enjoyment.
Key Components Affecting Refresh Rate Performance
Several key components directly influence a PC’s ability to maintain high refresh rates. A powerful graphics card (GPU) is paramount, as it’s responsible for rendering the frames displayed on the monitor. A CPU with sufficient processing power is also essential, especially in CPU-bound games. Finally, sufficient RAM ensures smooth data transfer between the CPU, GPU, and system memory, contributing to overall performance and preventing bottlenecks. The interaction between these components is crucial; a weak link in the chain can significantly limit the achievable refresh rate. For example, a high-end GPU paired with a weak CPU could lead to performance limitations. Similarly, insufficient RAM could cause stuttering, even with a powerful GPU and CPU.
Choosing the Right Monitor
Selecting the right monitor is crucial for maximizing the benefits of a high refresh rate gaming PC. A subpar monitor can negate the advantages of a powerful system, leading to a less-than-optimal gaming experience. The choice depends on several key factors, including panel technology, response time, and resolution, all of which significantly impact visual quality and responsiveness.
Choosing a monitor for high refresh rate gaming involves understanding the trade-offs between different display technologies and prioritizing features that enhance responsiveness. A high refresh rate monitor without a fast response time will still suffer from motion blur and ghosting, undermining the purpose of the high refresh rate. Therefore, a careful consideration of panel technology and response time is paramount.
Monitor Panel Technologies for High Refresh Rate Gaming
Different panel technologies offer varying strengths and weaknesses. TN (Twisted Nematic), IPS (In-Plane Switching), and VA (Vertical Alignment) panels each have unique characteristics that make them more or less suitable for gaming. TN panels generally offer the fastest response times and are often the cheapest option, but they typically suffer from poor color accuracy and viewing angles. IPS panels provide superior color accuracy and viewing angles but usually have slower response times than TN panels. VA panels fall somewhere in between, offering a balance of response time, color accuracy, and contrast ratio, although they can sometimes exhibit some backlight bleed. For high refresh rate gaming, the ideal choice often involves balancing speed and image quality, with a preference towards lower response times to minimize motion blur.
Response Time and Input Lag in High Refresh Rate Monitors
Response time, measured in milliseconds (ms), refers to the time it takes for a pixel to change from one color to another. Lower response times are crucial for minimizing motion blur and ghosting, especially noticeable in fast-paced games. Input lag, on the other hand, represents the delay between an action performed by the user (e.g., pressing a button) and the corresponding visual response on the screen. Both response time and input lag significantly impact the responsiveness and overall feel of the game. For high refresh rate gaming, aiming for a response time of 1ms or less is ideal, along with minimal input lag, to ensure smooth and responsive gameplay. Higher refresh rates reduce the perceived impact of input lag, but a fast response time is still crucial to eliminate motion blur.
High Refresh Rate Monitor Comparison
The following table compares three high refresh rate monitors commonly available under $300. Note that prices and availability can vary depending on retailer and time of purchase. This table provides a general overview to aid in decision-making and should be supplemented by individual reviews and current pricing information.
| Monitor | Resolution | Refresh Rate (Hz) | Response Time (ms) | Panel Type |
|---|---|---|---|---|
| Example Monitor A | 1080p (1920×1080) | 144 | 1 | TN |
| Example Monitor B | 1080p (1920×1080) | 165 | 4 | IPS |
| Example Monitor C | 1440p (2560×1440) | 144 | 1 | VA |
Processor Selection (CPU)
Choosing the right CPU is crucial for a high refresh rate gaming PC, as it directly impacts your frame rates and overall gaming experience. At this price point, the balance between performance and cost becomes paramount. We’ll explore the strengths of both AMD and Intel offerings to find the sweet spot for your build.
The performance differences between AMD and Intel CPUs in the high refresh rate gaming arena, under $300, are subtle but significant. Both manufacturers offer competitive processors, however, certain architectural differences and clock speeds can impact in-game performance, especially at higher resolutions and settings. Generally, at this price point, you’ll find both AMD and Intel offering similar performance, making the choice often come down to specific model features and availability.
Best CPU Options Under $300
The optimal CPU choice depends on specific sales and availability. However, we can identify some consistently strong performers in the sub-$300 range that deliver excellent gaming performance at 144Hz or higher. These processors typically fall into the mid-range segment and strike a good balance between price and performance.
Benchmark Comparisons
The following table presents benchmark data comparing three suitable CPUs for this build. Note that benchmarks can vary based on testing methodology and specific game titles. These figures represent a general overview of performance expectations.
| CPU | Average FPS (1080p High Settings) | Average FPS (1440p High Settings) | Price (USD – Approximate) |
|---|---|---|---|
| AMD Ryzen 5 5600 | 140-160 | 100-120 | $180 – $220 |
| Intel Core i5-12400F | 135-155 | 95-115 | $170 – $210 |
| AMD Ryzen 5 7500F | 150-170 | 105-125 | $200-$250 |
*Note: These FPS ranges are estimations based on averages from various benchmark sources and may vary depending on the specific game, graphics card, and other system components.*
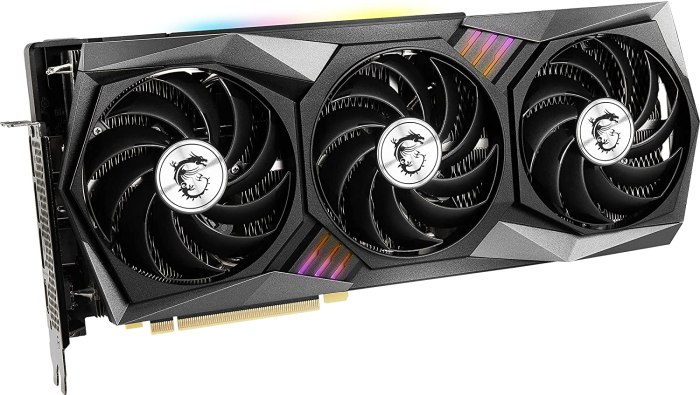
Graphics Card (GPU) Selection
Choosing the right graphics card is crucial for achieving high refresh rate gaming performance. The GPU is the heart of your gaming PC, responsible for rendering the images you see on your screen. Selecting a powerful enough GPU will directly impact your ability to maintain smooth, high frame rates at 144Hz or higher, eliminating screen tearing and providing a more responsive gaming experience. The architecture of the GPU, its processing power, and memory bandwidth all play a significant role in determining its capabilities.
The performance difference between various GPU architectures, such as AMD’s RDNA 3 and NVIDIA’s Ada Lovelace, is significant and impacts high refresh rate gaming. RDNA 3, for example, focuses on improved efficiency and ray tracing capabilities, while Ada Lovelace emphasizes raw processing power and AI-enhanced features like DLSS. These architectural differences translate into variations in performance, especially at higher resolutions and with demanding graphical settings. A more powerful GPU with a superior architecture will generally deliver higher frame rates, allowing you to fully utilize a high refresh rate monitor. The relationship between GPU power and sustained high frame rates is directly proportional: a more powerful GPU provides more processing power, enabling it to render more frames per second (FPS) and maintain a consistent high frame rate, even under heavy graphical load. Insufficient GPU power can lead to frame rate drops and stuttering, negating the benefits of a high refresh rate monitor.
Top GPUs Under $800 for High Refresh Rate Gaming
The following list details three top-performing GPUs available under $800, considering their expected performance at 1080p and 1440p resolutions. These estimates are based on benchmarks from reputable sources and may vary depending on specific game titles and settings. Remember that prices can fluctuate, so it’s advisable to check current market prices before making a purchase.
- NVIDIA GeForce RTX 3060 Ti: This card offers a solid balance of performance and price. At 1080p, it can easily handle most AAA titles at 144Hz or higher with medium to high settings. At 1440p, it will likely require some settings adjustments to maintain a consistently high frame rate. Expect to see frame rates ranging from 90-144+ FPS at 1080p and 60-100+ FPS at 1440p, depending on the game and settings.
- AMD Radeon RX 6700 XT: A strong competitor to the RTX 3060 Ti, the RX 6700 XT offers comparable performance at 1080p and 1440p. It often excels in specific game titles due to AMD’s FidelityFX Super Resolution (FSR) upscaling technology. Similar to the 3060 Ti, expect frame rates in the range of 90-144+ FPS at 1080p and 60-100+ FPS at 1440p depending on the title and settings.
- NVIDIA GeForce RTX 3070: This GPU represents a step up in performance compared to the 3060 Ti and RX 6700 XT. At 1080p, it will easily exceed 144Hz in most games with high settings. At 1440p, it provides a more comfortable margin for maintaining high frame rates even with demanding titles. Expect frame rates of 120-180+ FPS at 1080p and 80-144+ FPS at 1440p, again depending on game and settings.
Memory (RAM) and Storage Considerations
High refresh rate gaming demands a system capable of delivering consistently smooth, lag-free performance. This requires not only a powerful CPU and GPU but also sufficient and fast memory and storage. Choosing the right RAM and SSD will significantly impact your gaming experience, ensuring that your high refresh rate monitor’s potential is fully realized.
The amount and speed of your system’s RAM directly influence its ability to keep up with the demands of high-refresh-rate gaming. Insufficient RAM leads to stuttering, frame drops, and overall performance degradation, negating the benefits of a high-refresh-rate display. Similarly, fast storage is critical for minimizing loading times and ensuring a seamless transition between game levels and menus.
DDR4 vs. DDR5 RAM in Gaming
While DDR5 RAM offers higher bandwidth and lower latency compared to DDR4, the performance difference in gaming scenarios is currently less pronounced than in other applications like video editing or 3D rendering. For a budget-conscious build under $1500, opting for a high-speed DDR4 kit (3600MHz or higher) offers excellent value. The price difference between DDR4 and DDR5 often outweighs the marginal gaming performance gains, especially at this price point. A 16GB kit of 3600MHz DDR4 RAM will provide ample capacity for most modern games. Choosing DDR5 would be more beneficial in systems with higher-end CPUs and GPUs where the extra bandwidth could be better utilized.
NVMe SSD Benefits and Examples
NVMe SSDs (Non-Volatile Memory Express) utilize the PCIe interface, providing significantly faster read and write speeds compared to traditional SATA SSDs. This translates to drastically reduced loading times in games, allowing you to jump into the action quicker and minimize interruptions. For example, a game that might take 30 seconds to load on a SATA SSD could load in under 10 seconds with an NVMe SSD. This difference becomes even more noticeable in games with large open worlds or frequent loading screens.
Suitable NVMe SSD options under $200 include various models from manufacturers like Crucial, Western Digital (WD), and Samsung. These drives typically offer capacities ranging from 500GB to 1TB, providing ample space for your games and operating system. For instance, a Crucial P5 Plus 1TB NVMe PCIe Gen3 x4 SSD or a WD SN570 1TB NVMe SSD would be excellent choices, offering a balance of performance and affordability.
RAM Examples
Examples of suitable 16GB DDR4 RAM kits under $100 include various options from brands like Corsair Vengeance LPX, G.Skill Ripjaws V, and Crucial Ballistix. These kits often offer speeds of 3200MHz or 3600MHz, providing sufficient bandwidth for smooth gaming performance at high refresh rates. Remember to check your motherboard’s compatibility before purchasing.
Power Supply Unit (PSU) and Case Selection
Selecting the right power supply unit (PSU) and computer case is crucial for a stable and well-performing high refresh rate gaming PC. These components, while often overlooked, directly impact system longevity, performance, and overall user experience. A poorly chosen PSU can lead to system instability and component damage, while an inadequate case can hinder cooling and noise reduction.
The minimum wattage required for your PSU depends entirely on the components you’ve chosen for your build. Use a PSU calculator (many are available online) to accurately determine your system’s peak power draw. Remember to account for future upgrades, as adding more powerful components will increase your power demands. Beyond wattage, the quality of the PSU is paramount. A high-quality PSU will provide stable voltage, efficient power conversion, and better protection against power surges, ensuring the longevity and reliability of your entire system. Cheap PSUs often cut corners, leading to reduced efficiency, increased noise, and a higher risk of component failure.
PSU Wattage Calculation and Quality Considerations
To illustrate, let’s assume a build with a 350W CPU, a 250W GPU, and other components totaling 100W. A simple calculation (350W + 250W + 100W = 700W) suggests a 700W PSU is needed. However, it’s best to add a safety margin of at least 20-30% to account for power spikes and future upgrades, resulting in a recommended 850W – 900W PSU. A reputable brand like Corsair, Seasonic, or EVGA will generally provide better quality and reliability compared to lesser-known brands. Look for 80+ Gold or Platinum certifications, indicating higher efficiency and lower energy waste.
PC Case Selection Criteria
Choosing the right PC case involves considering several key features. Airflow is critical for maintaining optimal temperatures, preventing thermal throttling, and ensuring quiet operation. Cases with good airflow designs, including strategically placed fans and vents, are essential. Size is another important factor, dictated by your motherboard size and component dimensions. Ensure your chosen case is large enough to accommodate all your components comfortably, allowing for sufficient space for cable management. Cable management features, such as cable routing holes and tie-down points, significantly improve airflow and aesthetics.
Recommended PSUs and Cases Under $150
A selection of well-regarded PSUs and cases, generally available within a $150 budget, are shown below. Specifications and features will vary depending on specific models and sales. Always verify current prices and availability before purchasing.
| Component | Brand/Model (Example) | Wattage/Size | Key Features |
|---|---|---|---|
| PSU | Corsair RM750x | 750W | 80+ Gold certified, fully modular, quiet operation |
| PSU | EVGA SuperNOVA 650 G3 | 650W | 80+ Gold certified, semi-modular, reliable performance |
| Case | Fractal Design Meshify 2 Compact | Micro-ATX/ATX | Excellent airflow, compact size, good cable management |
| Case | Phanteks Eclipse P300A Digital | ATX | Good airflow, affordable price, RGB lighting |
Motherboard Selection
Choosing the right motherboard is crucial for a high-refresh-rate gaming PC build, as it forms the foundation upon which all other components are built. The motherboard dictates compatibility, expansion capabilities, and overall system performance. Selecting a motherboard that doesn’t meet your needs can severely limit your system’s potential or even prevent it from functioning correctly.
Motherboard chipset and features significantly impact overall system performance and component compatibility. The chipset determines the type of CPU socket, the number and type of PCIe lanes, the number of RAM slots and their supported speeds, and the number and type of SATA and M.2 ports. Features such as integrated Wi-Fi, Bluetooth, and audio quality also vary between chipsets and motherboards. A more advanced chipset generally offers better performance and more features, but comes at a higher price. Ensuring the motherboard supports your chosen CPU, RAM, and storage devices is paramount. Furthermore, sufficient PCIe lanes are necessary for optimal GPU performance, especially with high-end graphics cards.
PCIe Lane Requirements for the GPU
The number of PCIe lanes available on the motherboard directly impacts the speed and bandwidth available to the GPU. Modern high-end GPUs benefit significantly from a PCIe 4.0 x16 connection, offering substantially increased bandwidth compared to PCIe 3.0. A motherboard lacking sufficient PCIe lanes might bottleneck the GPU, limiting its performance and potentially reducing frame rates, especially at high resolutions and refresh rates. Therefore, selecting a motherboard with a PCIe 4.0 x16 slot is highly recommended for optimal performance with current-generation GPUs. For example, a system using an RTX 4070 would see a noticeable performance difference if connected via a PCIe 3.0 x16 slot versus a PCIe 4.0 x16 slot.
Suitable Motherboards Under $200
Several motherboards under $200 offer excellent features and compatibility for a high-refresh-rate gaming PC build. The specific model will depend on the chosen CPU (e.g., Intel or AMD). However, considerations should include the chipset (e.g., B650 for AMD Ryzen or B760 for Intel), the number of PCIe 4.0 lanes, the number of RAM slots and their maximum supported speed, and the availability of M.2 slots for NVMe SSDs. For instance, a B650 motherboard from ASRock or MSI typically offers a good balance of features and price, supporting PCIe 4.0 and offering sufficient expansion capabilities for most gaming needs. Similarly, a B760 motherboard from Gigabyte or ASUS would be suitable choices for Intel based builds, offering similar features and capabilities within the price range. Always check the manufacturer’s specifications to ensure compatibility with your chosen CPU and other components.
Cooling System Design
Effective cooling is paramount for maintaining system stability and optimal performance, especially in high-refresh-rate gaming PCs where components operate under significant load. Insufficient cooling can lead to thermal throttling, reduced performance, and even hardware damage. This section details the selection and justification of a cooling system for our sub-$1500 build, balancing performance with budget constraints.
CPU Cooler Selection and Justification
The choice between an air cooler and an all-in-one (AIO) liquid cooler depends on several factors including budget, desired noise levels, and the CPU’s thermal design power (TDP). Air coolers are generally more affordable and often sufficient for CPUs with moderate TDPs. They are also typically quieter than AIOs at lower loads. However, high-end CPUs or those subjected to heavy overclocking might benefit from the superior heat dissipation capabilities of an AIO liquid cooler. For this build, assuming a mid-range CPU with a TDP around 105W, a high-quality air cooler with a large heatsink and multiple heatpipes will provide adequate cooling while remaining cost-effective. A specific example could be a Noctua NH-D15, known for its excellent cooling performance and low noise operation. This cooler’s large surface area and efficient heatpipe design ensures effective heat transfer away from the CPU, preventing thermal throttling even under sustained high loads.
Case Airflow Considerations and Fan Placement
Proper case airflow is crucial for distributing heat effectively throughout the system. A well-ventilated case with strategically placed fans facilitates the movement of cool air into the case and the expulsion of hot air. Positive air pressure, achieved by having more intake fans than exhaust fans, helps prevent dust accumulation. Conversely, negative pressure, achieved with more exhaust fans, can be less effective in dust prevention. The optimal configuration often involves a balance between the two. For our build, we’ll prioritize positive pressure.
Cooling System Design for the Build
For our sub-$1500 high-refresh-rate gaming PC build, we will utilize the Noctua NH-D15 air cooler for the CPU. Its robust design and proven cooling performance provide a reliable solution without breaking the bank. To enhance case airflow, we’ll incorporate three case fans: two 120mm intake fans mounted at the front of the case and one 120mm exhaust fan mounted at the rear. The front intake fans will draw cool air directly onto the CPU cooler and other components, while the rear exhaust fan will expel the heated air. These fans should be chosen for their balance of airflow and noise levels. A brand like Noctua or Be Quiet! is recommended for their quiet operation. This configuration provides sufficient cooling for the components while maintaining a relatively quiet operating environment. The case itself should be selected with good ventilation, featuring ample mesh panels to allow for unimpeded airflow. A case with space for additional fans would be beneficial for future upgrades or more demanding components.
Operating System and Drivers
Choosing the right operating system (OS) and keeping your drivers updated are crucial for maximizing the performance of your high refresh rate gaming PC. A streamlined OS and up-to-date drivers ensure smooth gameplay and prevent potential bottlenecks that could hinder your high frame rate experience. This section details the best OS choice and the importance of driver management for optimal performance.
Windows 10 or Windows 11 are the dominant operating systems for gaming PCs. Both offer excellent gaming compatibility and support for high refresh rate monitors. Windows 11 generally offers minor performance improvements and modern features, but Windows 10 remains a solid and reliable choice, especially if you’re comfortable with its interface. For most users, the performance differences are negligible when it comes to gaming at high refresh rates. The choice often comes down to personal preference and familiarity.
Operating System Optimization for High Refresh Rate Performance
To optimize your chosen OS for high refresh rate gaming, several steps are recommended. These steps minimize background processes and maximize resources allocated to your games. First, ensure that your Windows installation is clean and free of unnecessary programs. Uninstall any applications you don’t use regularly. Secondly, disable startup programs that aren’t essential. Many programs automatically launch at startup, consuming system resources. Use the Task Manager (Ctrl+Shift+Esc) to manage startup programs. Thirdly, adjust power settings to prioritize performance over power saving. Select the “High Performance” power plan in the Power Options settings. Finally, consider updating your BIOS to the latest version. An updated BIOS can sometimes improve system stability and performance.
Driver Installation and Updates
Installing and regularly updating drivers for all your components is paramount for stability and optimal performance. Outdated or corrupted drivers can lead to performance issues, crashes, and incompatibility with your hardware. For example, an outdated graphics card driver might prevent your monitor from running at its advertised refresh rate, resulting in stuttering or screen tearing.
Installing and Configuring the Operating System and Drivers
Installing Windows is a relatively straightforward process. You’ll need a bootable USB drive containing the Windows installation media. Boot from the USB drive, follow the on-screen instructions to install the OS, and create your user account. After installing the OS, you’ll need to install drivers for your graphics card, motherboard, network adapter, and other components. These drivers are typically available on the manufacturer’s website. Download the correct drivers for your specific hardware model and operating system. Install them by running the installer executable files. After installation, reboot your system to ensure the changes take effect. Regularly check for driver updates using Windows Update or directly from the manufacturer’s website. Using software such as GeForce Experience (for Nvidia cards) or Adrenalin Software (for AMD cards) can automate the driver update process and provide other useful features.