Understanding Blue Screen Errors (BSODs)
Blue Screen of Death (BSOD) errors, also known as stop errors, are critical system errors that force Windows to shut down unexpectedly. These errors often indicate a serious problem with your hardware or drivers, requiring immediate attention to prevent data loss or further system damage. Understanding the information presented on the BSOD is crucial for effective troubleshooting.
BSODs present a variety of stop codes, each indicating a different underlying issue. These stop codes, combined with other information displayed, provide valuable clues for diagnosis. The complexity of the error and the required troubleshooting steps vary greatly depending on the specific stop code and accompanying details.
Types of BSOD Stop Codes and Their Common Causes
A wide range of stop codes exist, each linked to specific hardware or software problems. For instance, errors related to memory (RAM) often manifest as codes involving “PAGE_FAULT_IN_NONPAGED_AREA” or memory management issues. Problems with your hard drive might result in codes associated with disk errors, such as “0x0000007B (INACCESSIBLE_BOOT_DEVICE)”. Faulty drivers, especially graphics card drivers, frequently trigger stop codes related to video issues. Overheating components can also lead to various BSODs, often manifesting as system instability and crashes. Identifying the specific stop code is the first step towards pinpointing the source of the problem. For example, “IRQL_NOT_LESS_OR_EQUAL” often points to driver issues, while “SYSTEM_SERVICE_EXCEPTION” can indicate problems with various system components or software.
Information Displayed on a BSOD Screen and Its Interpretation
A typical BSOD displays several crucial pieces of information. Firstly, a stop code, usually a hexadecimal number (e.g., 0x0000007B), is prominently displayed. This code acts as a primary identifier for the error. Secondly, a brief description of the error is often provided, although this can sometimes be vague. Thirdly, the BSOD will list the involved files or drivers. This information is particularly useful for identifying potentially faulty hardware or software components. Finally, a technical description (often lengthy and complex) and a recommendation to restart the computer are given. Careful examination of all this information is critical for effective diagnosis. For example, seeing “atikmpag.sys” in the error details points to a problem with an AMD graphics driver.
Gathering Information from a BSOD
Documenting the details of a BSOD is essential for effective troubleshooting. A systematic approach is recommended.
- Take a Screenshot: If possible, quickly capture a screenshot of the entire BSOD screen. This provides a visual record of the error code and other relevant information. Many keyboards have a Print Screen key (often abbreviated as “PrtScn” or “Print Scr”). This copies the screen image to the clipboard; you can then paste it into an image editor.
- Note the Stop Code: Write down the exact hexadecimal stop code displayed on the screen. This is the most crucial piece of information for identifying the problem.
- Record the Error Description: Jot down the brief description provided alongside the stop code. This often gives a high-level indication of the problem area.
- List Involved Files and Drivers: Carefully note any files or drivers mentioned in the error details. These provide specific clues to the source of the error.
- Note the Time and Circumstances: Record the time the BSOD occurred and any actions you were performing at the time (e.g., running a specific program, playing a game, installing software). This contextual information can help in identifying the cause.
Hardware Diagnostics for BSODs
Identifying the root cause of a Blue Screen of Death (BSOD) often involves systematically investigating your computer’s hardware. A methodical approach, utilizing both built-in diagnostic tools and third-party utilities, is crucial for pinpointing the faulty component. This process minimizes downtime and ensures effective repair or replacement.
Troubleshooting hardware-related BSODs requires a structured approach. This involves a series of tests, starting with the most likely culprits and progressing to less common causes. Accurate diagnosis is key to resolving the issue permanently.
Troubleshooting Flowchart for Hardware-Related BSODs
The following flowchart Artikels a logical sequence for diagnosing hardware problems leading to BSODs. Each step represents a test or observation, guiding you towards the faulty component.
[Imagine a flowchart here. The flowchart would start with a “BSOD Occurs?” Yes/No decision point. A “Yes” branch would lead to “Check Event Viewer for Error Codes.” From there, branches would lead to testing individual components: “Test RAM (Memtest86+)”, “Test CPU (Prime95)”, “Test GPU (FurMark)”, “Test Storage (CHKDSK/CrystalDiskInfo)”. Each test would have a “Pass/Fail” decision point. A “Fail” would indicate a potential faulty component. A “Pass” would lead back to the previous test or to a final “No Hardware Fault Found” conclusion. A “No” branch from the initial point would lead to “Investigate Software Issues.”]
Common Hardware Components and Their Contribution to BSODs
The table below details common hardware components and their typical manifestations of failure leading to BSODs. Understanding these potential failure modes helps focus diagnostic efforts.
| Component | Potential BSOD Contributions | Typical Error Messages (Examples) | Diagnostic Methods |
|---|---|---|---|
| CPU | Overheating, overclocking instability, hardware failure | IRQL_NOT_LESS_OR_EQUAL, PAGE_FAULT_IN_NONPAGED_AREA | Monitoring CPU temperature (HWMonitor), stress testing (Prime95), checking for CPU errors in BIOS |
| RAM | Memory corruption, faulty modules, insufficient RAM | PAGE_FAULT_IN_NONPAGED_AREA, IRQL_NOT_LESS_OR_EQUAL, SYSTEM_SERVICE_EXCEPTION | Running memory diagnostic tools (Memtest86+, Windows Memory Diagnostic) |
| GPU | Overheating, driver issues, hardware failure | VIDEO_TDR_FAILURE, ATTEMPTED_WRITE_TO_READONLY_MEMORY | Monitoring GPU temperature (MSI Afterburner, HWMonitor), stress testing (FurMark), updating drivers |
| Storage (HDD/SSD) | Bad sectors, drive failure, driver issues | INACCESSIBLE_BOOT_DEVICE, NTFS_FILE_SYSTEM | Checking for errors (CHKDSK), monitoring drive health (CrystalDiskInfo), running manufacturer’s diagnostic tools |
Individual Hardware Component Testing Methods
Effective troubleshooting relies on systematically testing each component. This section details methods for individual component testing using both built-in tools and third-party utilities.
Testing each component involves utilizing both the operating system’s built-in diagnostic tools and dedicated third-party utilities for a more comprehensive evaluation. This approach ensures thorough testing and helps identify subtle problems that might otherwise be missed.
For example, while Windows Memory Diagnostic provides a basic memory test, Memtest86+ offers a more rigorous and comprehensive examination, detecting subtle memory errors that might not be apparent during standard use. Similarly, while CHKDSK can identify and repair some storage errors, dedicated tools like CrystalDiskInfo provide a more detailed health assessment of the drive, predicting potential failures. Using a combination of these approaches improves the accuracy of the diagnosis.
Memory Troubleshooting
Random Access Memory (RAM) is crucial for a computer’s operation. Problems with RAM are a common cause of Blue Screen of Death (BSOD) errors, often manifesting as system instability, crashes, or data corruption. Effective troubleshooting involves systematically testing your RAM to pinpoint faulty modules and, if necessary, adjusting BIOS settings.
Memory testing software provides a robust method for identifying RAM issues. These programs run rigorous tests to detect errors, including bit flips, timing issues, and other problems that may not be immediately apparent during normal system use.
Memory Diagnostic Software and Procedures
Several excellent memory testing tools are available, both free and commercial. MemTest86+, for instance, is a popular bootable option that thoroughly tests RAM independently of the operating system. Windows Memory Diagnostic is another built-in tool accessible through the operating system. These programs typically involve running a series of tests that analyze your RAM’s performance under various conditions. The results will highlight any errors or inconsistencies detected, allowing for precise identification of faulty modules. A typical test run might take several hours, depending on the size of your RAM and the chosen test parameters. Successful completion without errors generally indicates healthy RAM. Conversely, the presence of errors points towards a faulty RAM module.
Identifying and Replacing Faulty RAM Modules
Once memory testing reveals a faulty module, the next step is to identify and replace it. This usually involves physically accessing the RAM slots inside your computer case. Consult your computer’s manual for specific instructions on accessing the RAM slots. Generally, this involves opening the case, locating the RAM slots, and carefully releasing the clips holding the RAM modules in place. After removing the suspected faulty module, visually inspect it for any physical damage. Bent pins, discoloration, or visible damage can confirm a problem. Installation of a new RAM module involves reversing the removal process, ensuring proper alignment and secure seating. Remember to always ground yourself before handling computer components to avoid static electricity damage.
Configuring BIOS Memory Settings
The BIOS (Basic Input/Output System) offers options to configure memory settings. These settings control various aspects of RAM performance, including timings (latency), voltage, and operating frequency. Incorrectly configured settings can lead to instability or BSOD errors. Access the BIOS by pressing the appropriate key during the boot process (usually Del, F2, F10, or F12 – consult your motherboard manual). Within the BIOS, navigate to the memory settings section (often labeled “Advanced,” “AI Tweaker,” or similar). Common settings include RAM speed (frequency), timings (CL, tRCD, tRP, tRAS, etc.), and voltage. Changing these settings requires caution. Incorrect values can damage your RAM or lead to system instability. Unless you have a specific reason to modify these settings (e.g., overclocking), it is generally best to leave them at their default values or values recommended by your motherboard manufacturer. Overclocking, while potentially improving performance, increases the risk of instability and requires careful monitoring and testing. For example, attempting to increase the RAM frequency beyond its rated speed without also increasing the voltage might result in system instability and BSODs. Always consult your motherboard’s documentation and online resources before making any changes to BIOS settings.
CPU and Motherboard Diagnostics
Diagnosing CPU and motherboard problems contributing to Blue Screen of Death (BSOD) errors requires a systematic approach, combining software monitoring with visual inspection. Overheating CPUs and failing motherboard components are frequent culprits, leading to system instability and crashes. This section details effective methods for identifying these issues.
CPU Temperature Monitoring and Overheating
High CPU temperatures are a common cause of BSODs. Sustained operation above the manufacturer’s specified thermal threshold can lead to instability and ultimately, system failure. Several methods exist for monitoring CPU temperature. Dedicated software applications, readily available for Windows, provide real-time temperature readings, often displaying graphs to show temperature fluctuations over time. These programs typically monitor core temperatures individually, allowing for precise identification of overheating cores. Furthermore, many modern BIOS/UEFI interfaces include built-in temperature sensors, allowing for temperature checks even before the operating system loads. If the CPU temperature consistently exceeds the manufacturer’s recommended maximum temperature under normal load, it indicates a potential overheating problem requiring investigation. This could be due to insufficient cooling (inadequate heatsink, fan failure, or insufficient airflow), a failing thermal paste application, or even a failing CPU itself.
Common Motherboard Issues Leading to BSODs
Motherboard malfunctions can manifest in various ways, frequently resulting in BSODs. Capacitor failure is a common issue, particularly in older motherboards. Bulging or leaking capacitors are visual indicators of failure, often accompanied by system instability and random crashes. Faulty RAM slots can also trigger BSODs, as can problems with the chipset or other critical motherboard components. A visual inspection of the motherboard can reveal obvious signs of damage, such as burn marks or loose components. However, many motherboard issues are not visually apparent, requiring more sophisticated diagnostic tools. Faulty power delivery to the CPU or other components is another common problem that can lead to system instability and BSODs. This often manifests as intermittent crashes or restarts, particularly under heavy load.
Diagnostic Tools for CPU and Motherboard Health
Several tools assist in assessing CPU and motherboard health. Software like HWMonitor and Core Temp provide detailed CPU temperature and voltage readings, allowing for the detection of overheating or voltage instability. BIOS/UEFI setups often offer basic health checks, including temperature readings and fan speed monitoring. More advanced diagnostic tools, such as specialized motherboard diagnostic cards, can pinpoint faulty components on the motherboard itself. These cards typically provide a series of LEDs or other indicators to signal the status of various motherboard components. Additionally, memory testing tools, such as MemTest86, can help rule out RAM as the source of BSODs, as faulty RAM can sometimes trigger errors that manifest as BSODs, mimicking other hardware problems. While these tools provide valuable information, visual inspection of the hardware remains a crucial first step in diagnosing potential problems.
GPU Troubleshooting
Graphics Processing Units (GPUs) are crucial for visual output and can significantly contribute to system instability, leading to BSODs. Troubleshooting GPU-related blue screens often involves driver issues, overheating, or hardware failure. Addressing these problems systematically can often resolve the issue.
GPU driver problems are a frequent cause of BSODs. Outdated, corrupted, or incorrectly installed drivers can lead to system crashes. Overheating GPUs, due to insufficient cooling or dust buildup, can also cause instability and result in blue screen errors. Finally, a failing GPU itself can manifest as various system errors, including BSODs.
Updating or Rolling Back GPU Drivers
Updating or reverting to a previous version of your GPU drivers is a crucial step in troubleshooting BSODs. Outdated drivers may lack crucial bug fixes, while newer drivers might introduce incompatibility issues. To update, visit the manufacturer’s website (Nvidia, AMD, or Intel) and download the latest drivers for your specific GPU model. Ensure you select the correct operating system version. For a rollback, use the Device Manager in Windows. Locate your GPU, right-click, select “Properties,” go to the “Driver” tab, and click “Roll Back Driver.” This reinstalls a previously installed driver version. This process is particularly useful if a BSOD appeared immediately after a driver update.
Checking GPU Temperature and Identifying Overheating Problems
Excessive GPU temperature is a common cause of system instability and BSODs. Monitoring GPU temperature requires specialized software. Many free and paid utilities are available that display real-time temperature readings. These programs often show both GPU core and memory temperatures. A temperature consistently above 80-85°C (176-185°F) under load indicates potential overheating. If this occurs, check for dust buildup inside the computer case, ensure adequate airflow, and consider using a better cooling solution, such as a more powerful fan or an aftermarket cooler. Cleaning the fan blades and heatsink fins can significantly improve cooling. High ambient temperatures can also contribute to GPU overheating.
Running GPU Stress Tests to Identify Stability Issues
GPU stress tests push the graphics card to its limits, helping identify stability problems that might not appear under normal usage. Several free and commercial stress testing utilities are available. These tools simulate demanding graphical tasks, allowing you to monitor temperatures, clock speeds, and stability under extreme conditions. If the GPU crashes or causes a BSOD during a stress test, it indicates a stability issue. The results from these tests can help determine if the problem is related to driver issues, overheating, or a hardware defect. Examples of popular GPU stress testing tools include FurMark and Heaven Benchmark. These tools provide detailed reports indicating any stability problems encountered during the test.
Storage Device Diagnostics
Identifying and resolving issues with your hard drives or SSDs is crucial for overall system stability. A failing storage device can manifest as a blue screen error, data loss, or significant performance degradation. This section details methods for assessing the health of your storage devices and addressing potential problems.
A variety of tools are available to check the health of your hard drives and SSDs, ranging from built-in operating system utilities to comprehensive third-party applications. These tools provide insights into drive health, identify potential issues like bad sectors, and can even help predict potential failures. Proactive monitoring is key to preventing data loss.
Checking Hard Drive and SSD Health with Built-in Tools
Windows provides built-in tools for assessing hard drive and SSD health. Disk Management, accessible through the Computer Management console, allows you to view basic drive information such as capacity, partition layout, and file system. However, for more detailed health assessments, you should utilize the `chkdsk` command-line utility. This utility can scan for and attempt to repair file system errors and bad sectors. For example, running `chkdsk C: /f /r` will scan the C: drive, attempting to fix errors and recover readable information from bad sectors. Note that this process may take a considerable amount of time, depending on the drive size and the extent of any issues. Similar functionality is available in macOS through Disk Utility, providing similar diagnostics and repair options.
Identifying Bad Sectors and Performing Surface Scans
Bad sectors are areas on a hard drive or SSD that are no longer readable or writable. These can be identified through surface scan utilities included in some third-party diagnostic tools, or through the `chkdsk` utility mentioned above. A surface scan thoroughly examines the entire drive, identifying any areas that are experiencing read/write errors. The results of a surface scan will often indicate the location and number of bad sectors. While some bad sectors can be repaired, others may indicate a failing drive requiring replacement. For SSDs, the concept of bad sectors is slightly different; they often exhibit wear leveling and error correction mechanisms that mask the effects of bad sectors, making dedicated SSD diagnostic tools more valuable.
Replacing a Faulty Hard Drive or SSD
If diagnostics reveal a significant number of bad sectors, persistent errors, or other indicators of drive failure, replacement is often necessary. The process involves backing up any crucial data from the failing drive (if possible), purchasing a replacement drive of equal or greater capacity, physically installing the new drive, and then reinstalling the operating system and applications, or cloning the existing drive’s contents to the new one. It’s crucial to handle drives carefully to avoid further damage. Static electricity can damage sensitive components; grounding yourself before handling drives is recommended. The physical installation process varies depending on the type of drive (internal vs. external) and the computer’s design. Consult your computer’s documentation or online resources for specific instructions on accessing and replacing internal storage devices. After installation, ensure the new drive is properly recognized by the operating system and that data is successfully transferred or restored.
Power Supply Issues and BSODs
A seemingly innocuous power supply unit (PSU) can be the surprising culprit behind many Blue Screen of Death (BSOD) errors. Insufficient power delivery or erratic voltage fluctuations from a failing PSU can disrupt the delicate balance required for stable system operation, leading to unpredictable crashes and BSODs. Understanding how a PSU contributes to these errors is crucial for effective troubleshooting.
A faulty or insufficient power supply unit can cause BSODs in several ways. First, if the PSU doesn’t provide enough wattage to meet the demands of the system components under load (e.g., during gaming or intensive tasks), components may become unstable and malfunction, triggering a BSOD. Secondly, a failing PSU might deliver unstable voltages. Fluctuations or drops in voltage can cause data corruption, leading to system instability and ultimately, a BSOD. Finally, a completely failed PSU can prevent the system from even booting, resulting in a BSOD or no display at all. This is often accompanied by a lack of any fans spinning, and an absence of any power-on lights.
Testing Power Supply Output
Testing a PSU’s output requires specialized tools and a degree of caution. A multimeter is essential for measuring voltage and amperage. Before beginning any testing, ensure the PSU is unplugged from the wall and the PC is completely powered down. Connecting the multimeter incorrectly can result in damage to the meter or even electric shock. The PSU should be tested outside of the PC case for safety. Using a PSU tester is the safest and easiest method. These devices typically have multiple connectors to which you connect the PSU’s cables and they then indicate if the voltage and amperage on each rail is within tolerance. If you lack a PSU tester, you can test the PSU’s voltage output using a multimeter. Connect the multimeter’s leads to the appropriate PSU connector pins (refer to the PSU’s documentation or a reliable online resource for pinout information), selecting the DC voltage setting. Compare the readings to the PSU’s specifications. Significant deviations from the nominal voltage (e.g., +12V, +5V, +3.3V) indicate a problem. Amperage testing is more complex and typically requires a load tester, which simulates the draw of computer components. Exceeding the amperage rating of a rail can cause overheating and damage.
Selecting an Appropriate Power Supply
Choosing the right PSU is vital for system stability and longevity. Begin by calculating the total power consumption of all components. Manufacturers usually provide power consumption figures for their products. Add these figures together to get a total system power draw. It’s crucial to choose a PSU with a wattage rating significantly higher (at least 20-30%) than the calculated total to account for power spikes and future upgrades. For example, if the total system power consumption is 500W, a 650W or 750W PSU would be a safer choice. Consider the PSU’s efficiency rating (usually expressed as 80+ Bronze, Silver, Gold, Platinum, or Titanium). Higher efficiency ratings mean less wasted energy and lower operating temperatures. Finally, pay attention to the PSU’s rail configuration (e.g., single +12V rail vs. multiple +12V rails) and ensure it adequately supports your components’ power requirements. A reputable brand with a good warranty is also a wise investment.
Driver and Software Conflicts
Driver and software conflicts are a frequent cause of Blue Screen of Death (BSOD) errors. Incompatible or corrupted drivers can lead to system instability, ultimately resulting in a critical system failure and the dreaded blue screen. Identifying and resolving these conflicts is crucial for maintaining a stable and functional computer system. This section will explore methods for diagnosing and resolving driver-related BSOD issues.
Identifying and resolving driver conflicts involves a systematic approach, starting with identifying the problematic driver and then taking steps to either update, repair, or reinstall it. Often, a recent software or driver installation precedes the BSOD, providing a clue as to the source of the problem. Using system logs and error codes provides further insights into the nature of the conflict.
Common Driver-Related BSOD Errors and Solutions
A range of BSOD errors are directly attributable to driver issues. Understanding the error codes and their associated drivers is key to effective troubleshooting. The following table provides examples of common errors and their potential solutions.
| BSOD Error Code | Possible Cause | Solution |
|---|---|---|
| SYSTEM_SERVICE_EXCEPTION | Corrupted or incompatible device driver | Update or reinstall the suspected driver. Check Device Manager for flagged devices. |
| IRQL_NOT_LESS_OR_EQUAL | Faulty driver attempting to access memory improperly | Update or reinstall the suspected driver. Consider running a memory diagnostic. |
| PAGE_FAULT_IN_NONPAGED_AREA | Problem with a driver in the non-paged memory pool | Update or reinstall the suspected driver. Check for hardware conflicts. |
| DRIVER_IRQL_NOT_LESS_OR_EQUAL | Driver attempting to access memory at an inappropriate interrupt request level (IRQL) | Identify the offending driver using the error details and update or reinstall it. Check for hardware compatibility. |
Uninstalling and Reinstalling Drivers
The process of uninstalling and reinstalling drivers involves several steps. This is a common solution for resolving many driver-related BSODs. Incorrectly uninstalling or reinstalling a driver can potentially cause further issues, so proceed cautiously and follow the steps carefully.
- Identify the Problematic Driver: Use the BSOD error message or the Event Viewer to identify the driver causing the problem. Device Manager can also highlight drivers with issues.
- Uninstall the Driver: Open Device Manager (search for it in the Windows search bar). Locate the problematic device, right-click it, and select “Uninstall device”. Check the box to “Delete the driver software for this device” if available. This ensures a clean reinstallation.
- Restart Your Computer: Restarting the computer allows Windows to recognize the missing driver and prompt for reinstallation.
- Reinstall the Driver: Windows may automatically reinstall the driver. If not, you’ll need to download the latest driver from the manufacturer’s website for your specific hardware component (e.g., graphics card, network adapter). Follow the manufacturer’s instructions for installation.
- Verify Functionality: After reinstalling the driver, test your system thoroughly to ensure the BSOD issue is resolved.
BIOS and UEFI Settings
BIOS and UEFI settings, while often overlooked, play a crucial role in system stability. Incorrect configurations can lead to various issues, including the dreaded blue screen of death (BSOD). Understanding these settings and ensuring they are appropriately configured is essential for maintaining a healthy and stable PC. This section will explore key settings that can contribute to BSODs and provide guidance on their adjustment and resetting the BIOS/UEFI to factory defaults.
Improperly configured BIOS/UEFI settings can interfere with hardware communication, resource allocation, and boot processes, resulting in system instability and BSODs. Common culprits include incorrect boot order, overclocking settings, and power management options. Addressing these settings can often resolve persistent BSOD issues that have proven resistant to other troubleshooting methods.
BIOS/UEFI Settings that Can Cause BSODs
Several BIOS/UEFI settings can directly or indirectly cause BSODs. Incorrectly configured settings can lead to hardware conflicts, instability, and ultimately, system crashes. The following list details some of the most common culprits and explains how to adjust them safely.
- Boot Order: An incorrect boot order can prevent the system from booting from the correct drive, leading to a BSOD. Ensure that the primary boot device is set to your main operating system drive (usually an SSD or HDD).
- Overclocking Settings: Aggressive overclocking of the CPU, GPU, or RAM can push components beyond their safe operating limits, resulting in instability and BSODs. If overclocking, start with small increments and thoroughly test for stability. Reverting to default clock speeds is recommended if BSODs occur.
- XMP Profile: Enabling an XMP profile for RAM overclocking can sometimes cause instability if the RAM modules are not fully compatible with the motherboard. If encountering BSODs after enabling XMP, try disabling it and running the RAM at its default speed.
- CPU Voltage: Setting excessively high CPU voltage can generate excess heat and lead to instability. Maintain voltage within the manufacturer’s recommended range.
- Power Management Options: Incorrect power management settings can cause unexpected shutdowns or system instability, leading to BSODs. Explore options like C-states and power saving modes to find a balance between performance and stability.
- SATA Mode: In some cases, selecting the wrong SATA mode (e.g., AHCI instead of RAID or vice-versa) can cause boot problems and BSODs, especially when using specific storage devices.
- Secure Boot: While generally beneficial for security, disabling Secure Boot can sometimes resolve compatibility issues with certain operating systems or bootloaders, potentially eliminating BSODs related to boot failures.
Resetting BIOS/UEFI to Default Settings
If you suspect a BIOS/UEFI setting is causing BSODs, resetting to factory defaults is a straightforward troubleshooting step. The process varies slightly depending on the BIOS/UEFI manufacturer, but generally involves accessing the BIOS/UEFI setup utility (usually by pressing Del, F2, F10, F12, or Esc during boot) and locating an option labeled “Load Optimized Defaults,” “Load Setup Defaults,” “Reset to Factory Settings,” or something similar. Save the changes and reboot the system. This will revert all settings to their default values, providing a clean slate for further troubleshooting. Note: This will erase any custom overclocking settings you’ve applied.
Keeping BIOS/UEFI Firmware Updated
Regularly updating the BIOS/UEFI firmware is crucial for maintaining system stability and security. Updates often include bug fixes, performance improvements, and enhanced compatibility with newer hardware. Manufacturers usually provide BIOS/UEFI updates on their websites. However, updating the BIOS/UEFI is a critical process and should only be undertaken if you understand the risks involved. A failed BIOS update can render your system unusable. Always back up your data before attempting a BIOS update.
Advanced Troubleshooting Techniques
When basic troubleshooting steps fail to resolve persistent blue screen errors, more advanced techniques are necessary. These methods involve deeper system interventions and carry a higher risk of data loss if not performed correctly. Therefore, it’s crucial to back up important data before proceeding.
System Restore points offer a way to revert your system to a previous stable state, effectively undoing recent changes that might have triggered BSODs. A clean operating system installation provides a fresh start, eliminating potential software conflicts, while creating a bootable USB drive is essential for performing repairs or installations when the system won’t boot normally.
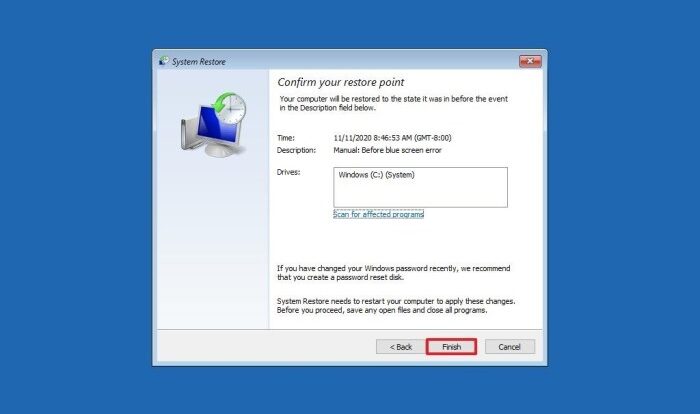
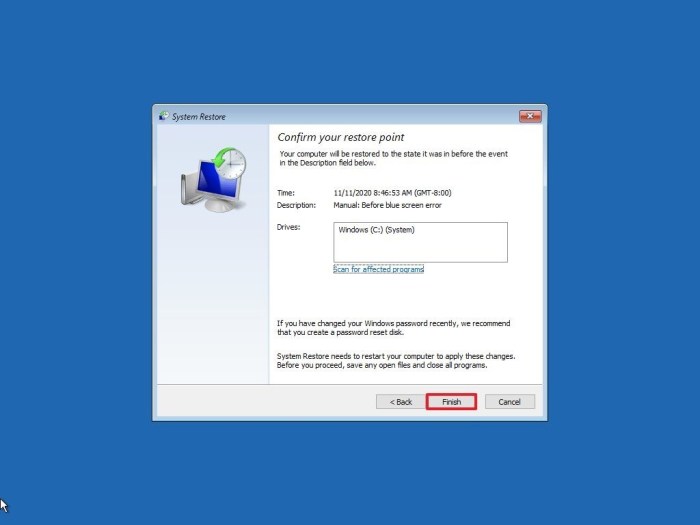
System Restore Points
System Restore creates snapshots of your system’s configuration at specific points in time. These snapshots include system files, registry settings, and installed drivers. If a BSOD occurs after a software update or driver installation, restoring to a previous restore point can often resolve the issue. To create a restore point, open the Control Panel, search for “Create a restore point,” and then click “Create.” Give the restore point a descriptive name (e.g., “Before Driver Update”) and click “Create.” Windows will then create a restore point. To use a restore point, follow the same steps to open the system protection window, select the desired restore point from the list, and follow the on-screen instructions. The system will reboot and revert to the selected state. Note that restoring to a previous point will undo changes made since that point, including newly installed software and created files.
Clean Installation of the Operating System
A clean installation of the operating system completely wipes your hard drive and reinstalls Windows from scratch. This process is effective in resolving persistent BSODs caused by deep-seated software conflicts, corrupted system files, or malware infections. Before starting, back up all essential data. You will need your Windows installation media (DVD or USB drive) and a product key. The process involves booting from the installation media, selecting your language and region, and then choosing “Install now.” You’ll be presented with options to upgrade or perform a clean installation; select the clean installation option. This will erase all data on the selected drive, so ensure you have completed a full backup beforehand. Follow the on-screen instructions to complete the installation, providing your product key and creating a user account. After installation, you’ll need to reinstall your applications and drivers.
Creating a Bootable USB Drive for System Repair
A bootable USB drive containing Windows installation media or recovery tools is essential for troubleshooting problems that prevent your system from booting normally. This allows you to access repair tools even if Windows fails to load. To create a bootable USB drive, you’ll need a USB flash drive (at least 8GB) and the Windows installation media (an ISO file downloaded from Microsoft’s website). Use the Media Creation Tool provided by Microsoft to create the bootable USB drive. This tool will guide you through the process of selecting the USB drive and downloading the necessary files. Once created, you can boot from the USB drive by changing the boot order in your BIOS/UEFI settings. This will allow you to access system repair options, including startup repair, system restore, and command prompt, to troubleshoot and potentially fix the BSOD issue.