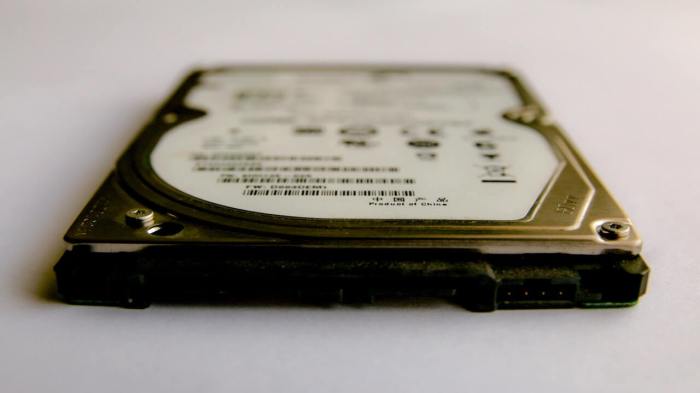
Understanding Data Loss Scenarios on Corrupted Hard Drives
Hard drive corruption is a significant threat to data integrity, leading to various levels of data loss. Understanding the causes and types of failures is crucial for prevention and effective data recovery. This section will explore the common scenarios that lead to data corruption and subsequent data loss on hard drives. We’ll examine the underlying causes, the resulting symptoms, and the severity of the data loss.
Common Causes of Hard Drive Corruption
Several factors can contribute to hard drive corruption. These range from physical damage to software errors and even firmware issues. Understanding these causes allows for better preventative measures and informed decisions regarding data recovery strategies. Physical impacts, such as drops or extreme temperatures, can cause mechanical failures. Logical errors, stemming from software glitches or operating system issues, can also lead to data inaccessibility. Finally, firmware problems, related to the hard drive’s internal software, can severely compromise its functionality.
Types of Hard Drive Failures
Hard drive failures are broadly categorized into three main types: mechanical, logical, and firmware failures. Mechanical failures involve physical damage to the hard drive’s components, such as the read/write heads, platters, or motor. Logical failures are related to software issues or the file system, impacting the ability to access data. Firmware failures involve problems with the hard drive’s embedded software, often rendering the drive unusable.
Examples of Error Messages
Specific error messages can indicate hard drive corruption. These messages vary depending on the operating system and the nature of the failure. Examples include “Disk read error,” “Bad sectors detected,” “The file or directory is corrupted and unreadable,” “Unexpected error,” and “Drive not found.” The specific wording of the message can provide clues about the type and severity of the corruption.
Causes, Types, Symptoms, and Severity of Data Loss
The following table summarizes common causes, types of failures, associated symptoms, and the severity of data loss:
| Cause | Type of Failure | Symptoms | Data Loss Severity |
|---|---|---|---|
| Physical shock (dropping the drive) | Mechanical | Clicking sounds, drive not detected, failure to boot | High – potentially complete data loss |
| Power surge | Mechanical/Logical | System crashes, data corruption, error messages | Medium to High – depending on the extent of damage |
| Malware infection | Logical | Slow performance, system instability, file deletion | Medium – potentially recoverable with anti-malware and data recovery tools |
| Software errors (OS crash) | Logical | Blue screen errors, file system errors, inability to access files | Low to Medium – depending on the nature of the error |
| Firmware corruption | Firmware | Drive not recognized, drive spins but doesn’t initialize | High – data may be unrecoverable without specialized tools |
| Bad sectors | Mechanical/Logical | Read/write errors, file corruption, system instability | Medium – severity depends on the number and location of bad sectors |
| Overheating | Mechanical | Slow performance, drive failure | Medium to High – prolonged overheating can lead to severe damage |
DIY Data Recovery Methods
Attempting DIY hard drive data recovery can be a cost-effective solution, especially for less critical data. However, it’s crucial to understand the limitations and potential risks involved before proceeding. Success depends heavily on the nature and extent of the drive’s damage, as well as your technical proficiency.
Software-Based Data Recovery Solutions
Software-based data recovery offers a non-invasive approach to retrieving lost data. These programs scan your hard drive for recoverable files, even if the file system is corrupted. Different software options cater to varying levels of technical expertise and data loss scenarios. Their effectiveness depends on factors such as the type of data loss, the extent of drive damage, and the software’s capabilities.
Capabilities and Limitations of Data Recovery Software
Data recovery software varies widely in its capabilities. Some are designed for simple file recovery after accidental deletion, while others can handle more complex scenarios like partition table corruption or boot sector damage. High-end professional software often boasts advanced algorithms and features to recover data from severely damaged drives, including those with physical damage. However, even the most sophisticated software cannot guarantee recovery in all cases. Severe physical damage, such as head crashes or significant platter damage, may render data irretrievable, regardless of the software used. Furthermore, the longer you wait after data loss, the lower the chances of successful recovery become, as the data may be overwritten.
Free vs. Paid Data Recovery Software
Free data recovery software typically offers basic functionalities, often sufficient for recovering recently deleted files or files lost due to minor system errors. Examples include Recuva and PhotoRec. These programs are user-friendly but may lack advanced features for handling complex data loss situations. Paid software, such as Disk Drill or R-Studio, generally provides more advanced features, support for a wider range of file systems and drive types, and often includes technical support. They typically offer a trial period, allowing users to evaluate their capabilities before committing to a purchase. The choice between free and paid software depends on the complexity of the data loss and the user’s technical skills. Simple data loss scenarios might be adequately addressed by free software, while more severe issues may necessitate the use of paid professional tools.
Using TestDisk for Data Recovery: A Step-by-Step Guide
TestDisk is a powerful, free, open-source data recovery utility capable of repairing partition tables and recovering lost partitions. It’s command-line based, requiring some technical understanding, but its capabilities make it a valuable tool.
- Download and Installation: Download TestDisk from a reputable source and extract the files. No installation is typically required; the program runs directly from the extracted folder.
- Boot from a bootable media (optional): For best results, especially with severely damaged drives, boot from a bootable USB drive or CD containing TestDisk. This prevents potential conflicts with the operating system.
- Select the drive: Once TestDisk is running, select the hard drive containing the lost data.
- Choose the partition table type: TestDisk will prompt you to select the partition table type (e.g., Intel, GPT). Choose the correct type for your hard drive.
- Analyze and Recover: TestDisk will analyze the drive and attempt to identify lost partitions. Follow the on-screen prompts to analyze and recover the partitions.
- Write changes (Caution!): Before writing changes, carefully review the detected partitions. Incorrectly writing changes can potentially worsen the situation. Only proceed if you are confident in the detected partitions.
- Copy recovered data: Once partitions are recovered, copy the data from the recovered partitions to a different, healthy drive to prevent further data loss.
Precautions Before Attempting Software-Based Recovery
Before attempting software-based data recovery, several precautions should be taken to maximize your chances of success and minimize the risk of further data loss:
- Do not write any new data to the affected drive: Writing new data increases the likelihood of overwriting lost data, making recovery more difficult or impossible.
- Create a backup image of the drive (if possible): This allows you to work on a copy of the drive, preserving the original in its current state. Software like ddrescue can create forensic images.
- Choose a reliable and reputable data recovery software: Research and select software with a good reputation and positive user reviews.
- Read the software’s instructions carefully: Understand the software’s functionalities and limitations before using it.
- Work in a clean and stable environment: Ensure your computer is free from malware and has sufficient resources to run the data recovery software.
DIY Data Recovery Methods

This section delves into hardware-based approaches for recovering data from a corrupted hard drive. While software methods attempt to repair the file system, hardware approaches directly address potential physical drive issues. Cloning a corrupted drive is a key strategy in this category, offering a safer way to access data without risking further damage to the original drive.
Cloning a Corrupted Hard Drive
Cloning involves creating an exact bit-by-bit copy of the source drive’s contents onto a new, healthy drive. This process is crucial when dealing with corrupted hard drives because it allows you to work with a copy while leaving the original drive untouched, minimizing the risk of additional data loss. Successful cloning depends on selecting the appropriate hardware and software, understanding the process, and anticipating potential complications.
Hardware and Tools for Cloning
Several hardware components are necessary for a successful hard drive clone. First, you need a source drive (the corrupted hard drive) and a target drive (a new, healthy hard drive with at least the same capacity as the source drive, preferably larger to provide a safety margin). A suitable cloning device is also essential; this could be a hardware cloning device that connects directly to both drives, or a docking station that allows for easy connection and access to both drives. In addition to the drives and cloning device, you will require a computer capable of running the cloning software. Finally, appropriate cables (SATA or USB, depending on the interface of your drives and cloning device) are essential for connecting all components.
Potential Risks and Challenges of Hardware-Based Recovery
While cloning offers a safer approach than direct access to a corrupted drive, certain risks and challenges still exist. The most significant risk is the possibility of further damaging the source drive during the cloning process, particularly if the drive has severe physical damage. If the source drive is experiencing head crashes or other severe mechanical issues, attempting a clone may worsen the condition, potentially rendering the data irretrievable. Another challenge involves selecting appropriate software. Incompatible or poorly configured software may lead to incomplete or corrupted clones. Finally, time constraints may be a factor; cloning large drives can be a time-consuming process. For example, cloning a 4TB drive could take several hours, depending on the speed of the drives and the cloning software used.
Cloning a Hard Drive: A Step-by-Step Flowchart
The following flowchart illustrates the process of cloning a hard drive:
[Imagine a flowchart here. The flowchart would begin with “Select Source and Target Drives,” branching to “Connect Drives and Cloning Device,” then to “Install and Launch Cloning Software,” followed by “Select Source and Target Drives in Software,” then “Initiate Cloning Process,” and finally “Verify Clone Integrity.” Each step would have a potential branch indicating success or failure, with appropriate actions for each outcome, such as “Proceed to Data Recovery” for success and “Troubleshoot/Repeat” or “Seek Professional Assistance” for failure. The flowchart would visually represent the sequential nature of the process and potential branching paths based on the outcome of each step.]
Advanced Techniques for Corrupted Drive Repair
Recovering data from severely corrupted hard drives often necessitates moving beyond basic DIY methods. These advanced techniques require more technical expertise and potentially specialized tools, but they can significantly increase your chances of successful data retrieval when facing complex data loss scenarios. Improper use can lead to further data loss, so proceed with caution and ideally back up any recovered data immediately.
Low-Level Formatting and Data Recovery Implications
Low-level formatting, unlike the high-level formatting you perform when installing an operating system, directly addresses the physical structure of the hard drive. It essentially rewrites the drive’s firmware, essentially creating a blank slate. This process is rarely needed by typical users and is extremely destructive to any existing data. While some data recovery tools might attempt to recover data *after* a low-level format, the success rate is drastically reduced, as the fundamental addressing system of the drive has been altered. Essentially, the drive’s map of where data is stored has been overwritten, making the recovery process much more challenging. The data is still physically present on the platter, but locating and reconstructing it becomes a significantly more complex task.
Specialized Tools for Repairing Bad Sectors
Bad sectors are areas on a hard drive that have become physically damaged, preventing the drive from reliably reading or writing data to them. Specialized tools, often available as part of professional data recovery software suites, can attempt to repair or bypass these bad sectors. These tools use advanced algorithms to identify bad sectors, attempt to read data from them multiple times using different techniques, and then either recover the data or mark the sector as unusable, preventing further attempts to access it. The effectiveness of these tools depends on the severity of the damage. Minor surface scratches might be repairable, but significant physical damage is usually irreversible. Examples of such tools include, but are not limited to, Spinrite and various commercial data recovery software packages. These tools often include features like surface scan, bad sector remapping, and read/write error correction.
Situations Requiring Advanced Techniques
Advanced techniques are often necessary when facing severe data corruption, such as extensive bad sector clusters, severe firmware corruption, or physical damage to the drive’s platters or read/write heads. For example, a hard drive that has experienced a significant physical shock, resulting in multiple bad sectors spread across the drive, would necessitate the use of specialized tools for sector repair and data recovery. Another scenario might involve a hard drive with a corrupted boot sector, rendering the operating system unable to access the drive’s data. In such cases, advanced techniques, such as using a low-level format (with extreme caution and understanding of the implications) or utilizing specialized firmware repair tools, may be required. Finally, a drive that has suffered a head crash, where the read/write heads have physically damaged the platters, might require a clean room environment and professional intervention.
Comparison of Advanced Techniques
| Technique | Effectiveness | Complexity | Risk of Data Loss |
|---|---|---|---|
| Specialized Bad Sector Repair Tools | Moderate to High (depending on the severity of damage) | Moderate | Low (if used correctly) |
| Low-Level Formatting | Very Low (for data recovery) | High | Very High |
| Firmware Repair Tools | Moderate (depends on the type and extent of firmware corruption) | High | Moderate |
Data Recovery from Specific File Systems
Recovering data from a corrupted hard drive depends heavily on the file system used. Different file systems organize data in unique ways, leading to varying levels of difficulty in data recovery. Understanding these differences is crucial for successful DIY recovery attempts. This section explores the challenges and best practices associated with recovering data from NTFS, FAT32, and ext4 file systems.
NTFS Data Recovery Challenges and Methods
NTFS (New Technology File System), commonly used in Windows operating systems, employs a sophisticated structure with features like journaling and security descriptors. While these features enhance data integrity in normal operation, they can complicate data recovery in case of corruption. Data recovery tools need to navigate complex metadata structures to locate and reconstruct files. Common challenges include the Master File Table (MFT) corruption, which is the central index of all files and folders, and the loss of file allocation table entries, hindering the reconstruction of file fragments. Successful recovery often requires specialized software capable of analyzing the MFT and recovering fragmented files. Best practices include immediately ceasing any further write operations to the drive and using a read-only data recovery tool.
FAT32 Data Recovery Challenges and Methods
FAT32 (File Allocation Table 32), simpler than NTFS, is often used in USB drives and older storage devices. While its simpler structure makes recovery potentially easier, it lacks features like journaling, making it more vulnerable to data loss. Corruption often manifests as a damaged file allocation table, rendering files inaccessible. Recovery tools need to reconstruct the file allocation table and recover fragmented files. Because of the lack of journaling, recovering data from a FAT32 drive requires meticulous care. Best practices include avoiding further writing to the drive and using a tool that can handle FAT32-specific errors. Recovery is often more straightforward than with NTFS, due to its simpler structure.
ext4 Data Recovery Challenges and Methods
ext4 (fourth extended file system) is a common file system for Linux systems. It incorporates journaling, similar to NTFS, offering a degree of protection against data loss. However, severe corruption can still render data inaccessible. Journal recovery plays a key role in ext4 data recovery, as the journal often contains information about the file system’s state before the corruption occurred. Recovery tools need to be capable of interpreting the ext4 journal and reconstructing files based on the journal entries and remaining file system structures. Best practices involve the same precautions as with NTFS and FAT32: immediately cease write operations and utilize a read-only recovery tool designed for ext4.
File System Comparison: Data Recovery Strengths and Weaknesses
| File System | Strengths (Data Recovery) | Weaknesses (Data Recovery) |
|---|---|---|
| NTFS | Journaling can aid recovery, sophisticated tools available | Complex structure, MFT corruption can be challenging |
| FAT32 | Simpler structure, potentially easier recovery | Lacks journaling, more vulnerable to data loss |
| ext4 | Journaling aids recovery, robust tools available | Complex structure, severe corruption can be difficult |
Preventing Future Data Loss
Data loss from hard drive failure can be devastating, impacting personal memories, crucial business information, and valuable projects. Proactive measures are essential to mitigate this risk and ensure data integrity. Implementing a comprehensive strategy that combines preventative maintenance, regular backups, and potentially redundant storage solutions significantly reduces the likelihood of experiencing catastrophic data loss.
Regular backups are the cornerstone of any robust data protection strategy. They provide a safety net, allowing you to restore your data in the event of a hard drive failure or other unforeseen circumstances. However, simply backing up your data isn’t enough; a well-defined backup strategy is crucial to ensure the effectiveness and accessibility of your backups.
Regular Backups and Backup Strategies
A robust backup strategy involves creating multiple copies of your data using different methods and storing them in separate locations. This approach minimizes the risk of losing all your data due to a single point of failure, such as a fire or theft. Consider these options:
- Local Backups: These backups are stored on a secondary hard drive or external storage device connected to your computer. While convenient, local backups are vulnerable to the same physical threats as your primary hard drive. They are best used in conjunction with other backup methods.
- Cloud Backups: Cloud storage services offer offsite backup solutions, protecting your data from physical damage or theft at your location. Services like Backblaze, iDrive, and CrashPlan provide various storage options and automated backup scheduling.
- Network Attached Storage (NAS): A NAS device acts as a central storage location for multiple computers on a network. This provides a centralized backup solution with the added benefit of easy data sharing among devices.
- 3-2-1 Backup Rule: This widely accepted rule advocates for maintaining three copies of your data, using two different storage media, with one copy stored offsite. This provides maximum protection against data loss.
RAID Configurations for Data Redundancy
Redundant Array of Independent Disks (RAID) is a technology that combines multiple hard drives into a single logical unit, providing enhanced performance and data redundancy. Different RAID levels offer varying degrees of redundancy and performance characteristics. For example:
- RAID 1 (Mirroring): Data is mirrored across two drives, providing immediate data redundancy. If one drive fails, the other drive continues to operate without interruption.
- RAID 5 (Striping with Parity): Data is striped across multiple drives, with parity information distributed across all drives. This allows for the recovery of data if one drive fails. RAID 5 offers a good balance between performance and redundancy.
- RAID 10 (Mirrored Stripes): This configuration combines mirroring and striping, offering both high performance and redundancy. It can tolerate multiple drive failures.
Implementing RAID requires specialized hardware or software and careful consideration of your specific needs and budget. It’s not a replacement for regular backups but rather a complementary strategy to enhance data protection.
Proactive Hard Drive Maintenance and Data Backup Schedule
A proactive approach to hard drive maintenance and data backup is crucial. Regular checks and scheduled backups significantly reduce the risk of data loss.
Here’s a sample schedule:
| Task | Frequency | Notes |
|---|---|---|
| Run a disk check utility (e.g., chkdsk in Windows, fsck in macOS) | Monthly | Identifies and repairs file system errors. |
| Monitor hard drive health using SMART monitoring tools | Weekly | Detects potential drive failures early. |
| Back up critical data | Daily (for frequently changing files) or Weekly (for less frequently changing files) | Use a combination of local and offsite backup methods. |
| Full system backup | Monthly | Creates a complete image of your system. |
| Review and test backups | Quarterly | Verify that your backups are accessible and restorable. |
Illustrating Data Recovery Processes
Understanding the visual representation of data on a hard drive and the processes involved in recovery is crucial for successful DIY repair. This section will illustrate the structure of a hard drive, the scanning process, and the recovery of a specific file type.
A hard drive’s structure can be visualized as a series of concentric circles (tracks) divided into sectors. These sectors are the smallest addressable units of data storage. Data is written to these sectors, and the operating system maintains a file allocation table (FAT) or a similar structure (like a Master File Table in NTFS) that maps files to their corresponding sectors. This mapping can become fragmented, meaning a single file might be scattered across numerous non-contiguous sectors. Furthermore, the drive’s platter surface contains numerous heads that read and write data, and the overall structure is managed by firmware within the drive’s controller. Imagine a vinyl record, where each track is like a concentric circle on the platter, and the grooves are analogous to the sectors. The needle reading the record is similar to the read/write head.
Hard Drive Structure and Data Allocation
Consider a simplified example: A 1GB file is initially written contiguously to sectors 1-1000. Over time, as more files are written and deleted, the drive’s free space becomes fragmented. Now, imagine that the 1GB file needs to be expanded. The additional data may be written to non-contiguous sectors, perhaps sectors 2000-2500 and 3000-3100. This fragmentation makes data recovery more challenging, as the recovery tool needs to identify and reassemble the scattered fragments.
Scanning a Hard Drive for Recoverable Data
Data recovery software uses various algorithms to scan a hard drive. A typical scan involves a low-level scan which examines the raw sectors of the drive for data signatures and file headers. The scan results would show a list of found files, their file sizes, and their file paths (if possible). The software might also indicate the file’s condition – whether it’s intact, partially damaged, or severely corrupted. A successful scan might reveal that the previously mentioned 1GB file is fragmented into three parts: one largely intact (sectors 1-1000), one partially damaged (sectors 2000-2500, with some sectors unreadable), and one relatively intact (sectors 3000-3100). The software will highlight the extent of damage for each fragment, allowing the user to make informed decisions about recovery.
Recovering a JPEG Image File
Let’s assume a corrupted JPEG image (photo.jpg) needs to be recovered. The recovery software has identified the file’s header and data fragments. The recovery process would involve the following steps: 1) The software identifies and locates all fragments belonging to “photo.jpg”. 2) The software attempts to reconstruct the file by reassembling the fragments in the correct order, based on the header and internal structure of the JPEG file format. 3) The software might attempt data correction or error correction to repair damaged sectors. 4) Finally, the software saves the recovered file to a new location. If the file was heavily fragmented or corrupted, the resulting image may be incomplete or contain artifacts. The success rate depends on the extent of the corruption and the capabilities of the recovery software.